This guide walks you through how to assess what you're dealing with, prep correctly, and apply a repair that actually holds through freeze-thaw cycles – not just until the next rain.
Before You Start – Assess the Damage
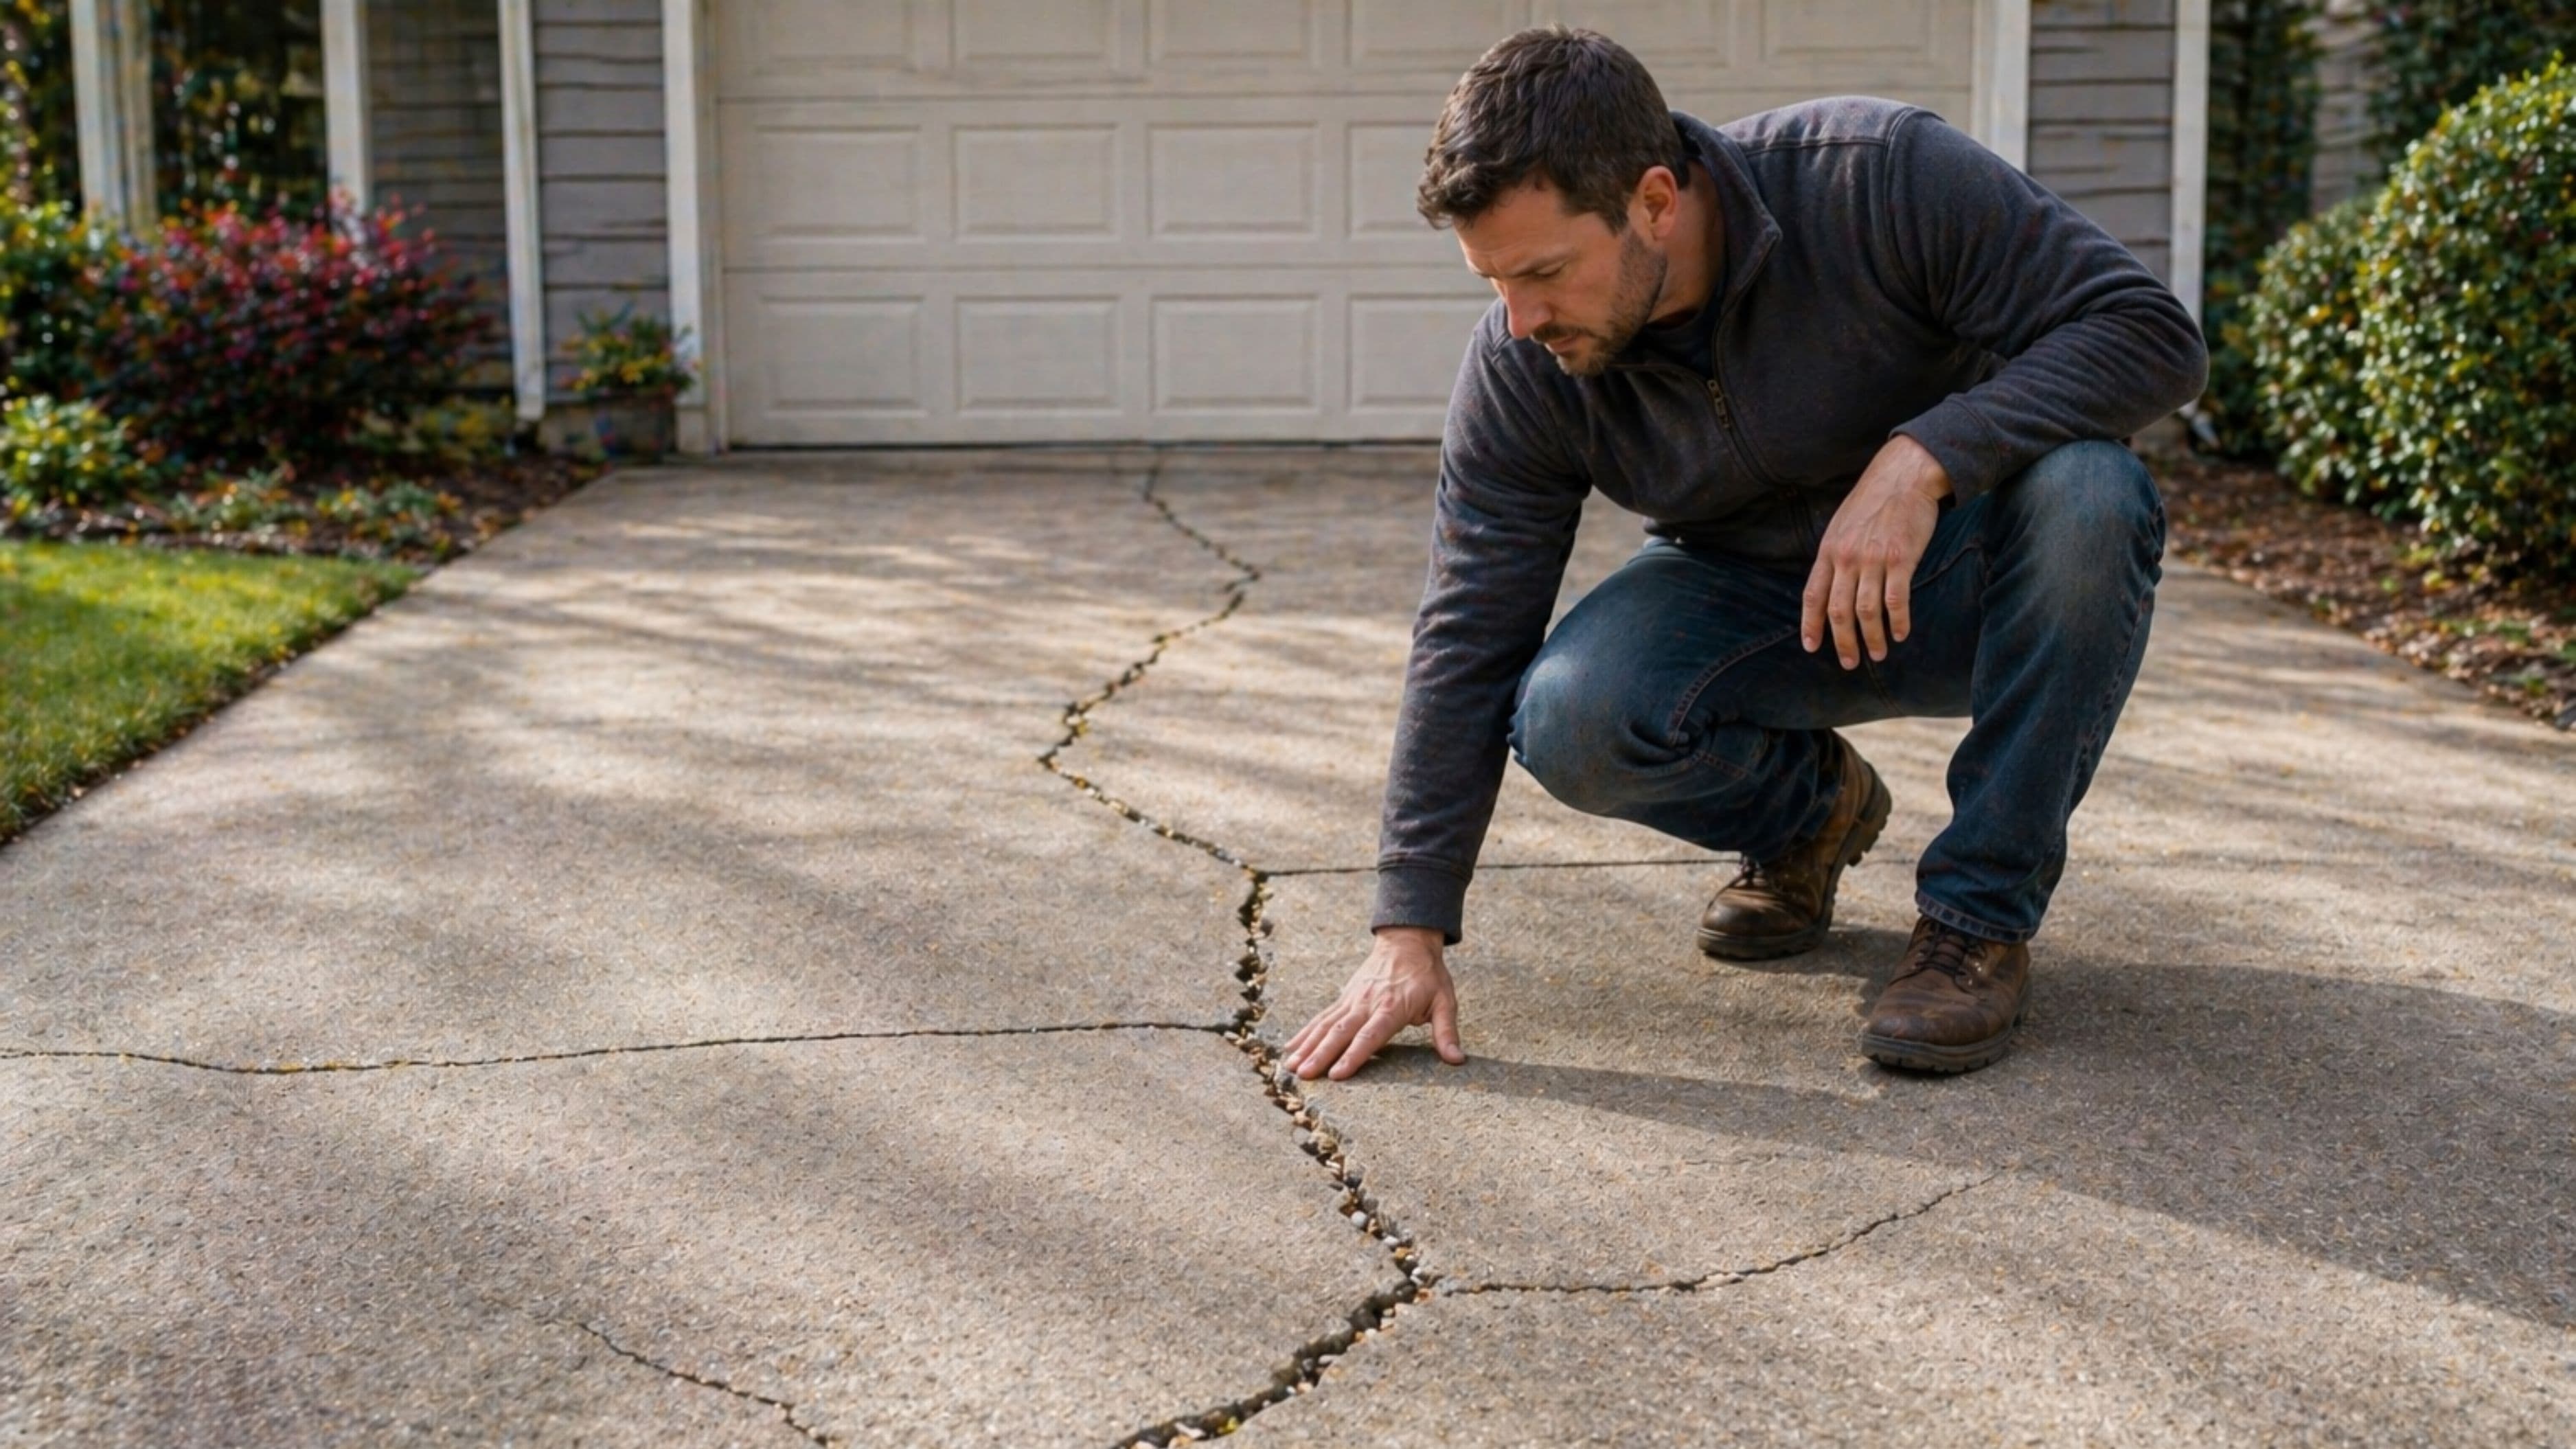
Not all cracks are the same, and the repair approach depends on what type you're working with. Spend five minutes walking the driveway and categorizing what you see before buying anything.
Hairline cracks (under 1/4 inch wide) are typically surface shrinkage cracks from the original pour or minor settling. They look worse than they are structurally and respond well to liquid crack fillers or concrete caulk.
Moderate cracks (1/4 inch to 1/2 inch wide) have usually been open long enough for debris to pack in and may show slight vertical displacement between the two edges. These need a semi-rigid polyurethane or epoxy filler with proper preparation to hold.
Wide or deep cracks (over 1/2 inch, or any crack with vertical displacement between edges) suggest structural movement – uneven settling, root damage, or subbase failure. These can still be DIY-patched for cosmetic and weather protection purposes, but if the displacement is severe (one side of the crack is noticeably higher or lower than the other), a structural assessment before patching is worth considering.
Surface spalling – where the top layer of concrete is flaking or pitting rather than cracking – is a separate issue addressed with a resurfacer rather than a crack filler.
One crack running diagonally from a corner of the driveway slab, or a spiderweb of cracks in one section, can indicate the slab is undermined at that point. Filling the cracks helps for the short term but won't prevent further settlement. If you're seeing that pattern, check whether the cracked section feels soft or hollow when you walk on it – a slight give underfoot means the subbase needs attention before the surface repair makes sense.
Tools and Materials You'll Need
Getting everything together before you start saves multiple trips and keeps the repair moving efficiently.
For hairline to moderate cracks:
For wider cracks and deeper repairs:
Time estimate: 2–4 hours including prep and initial cure time before the area can be walked on. Full cure before driving on the repair takes 24–72 hours depending on product and temperature.
Cost estimate: $20–$60 for materials depending on the number and size of cracks.
Step 1 – Clean Out the Cracks Thoroughly
This step is the most tedious and the most skipped – and skipping it is why most DIY concrete repairs fail within a season. Filler can't bond to a crack that's full of dirt, debris, loose concrete, and moisture. The repair material is only as good as the surface it's adhering to.
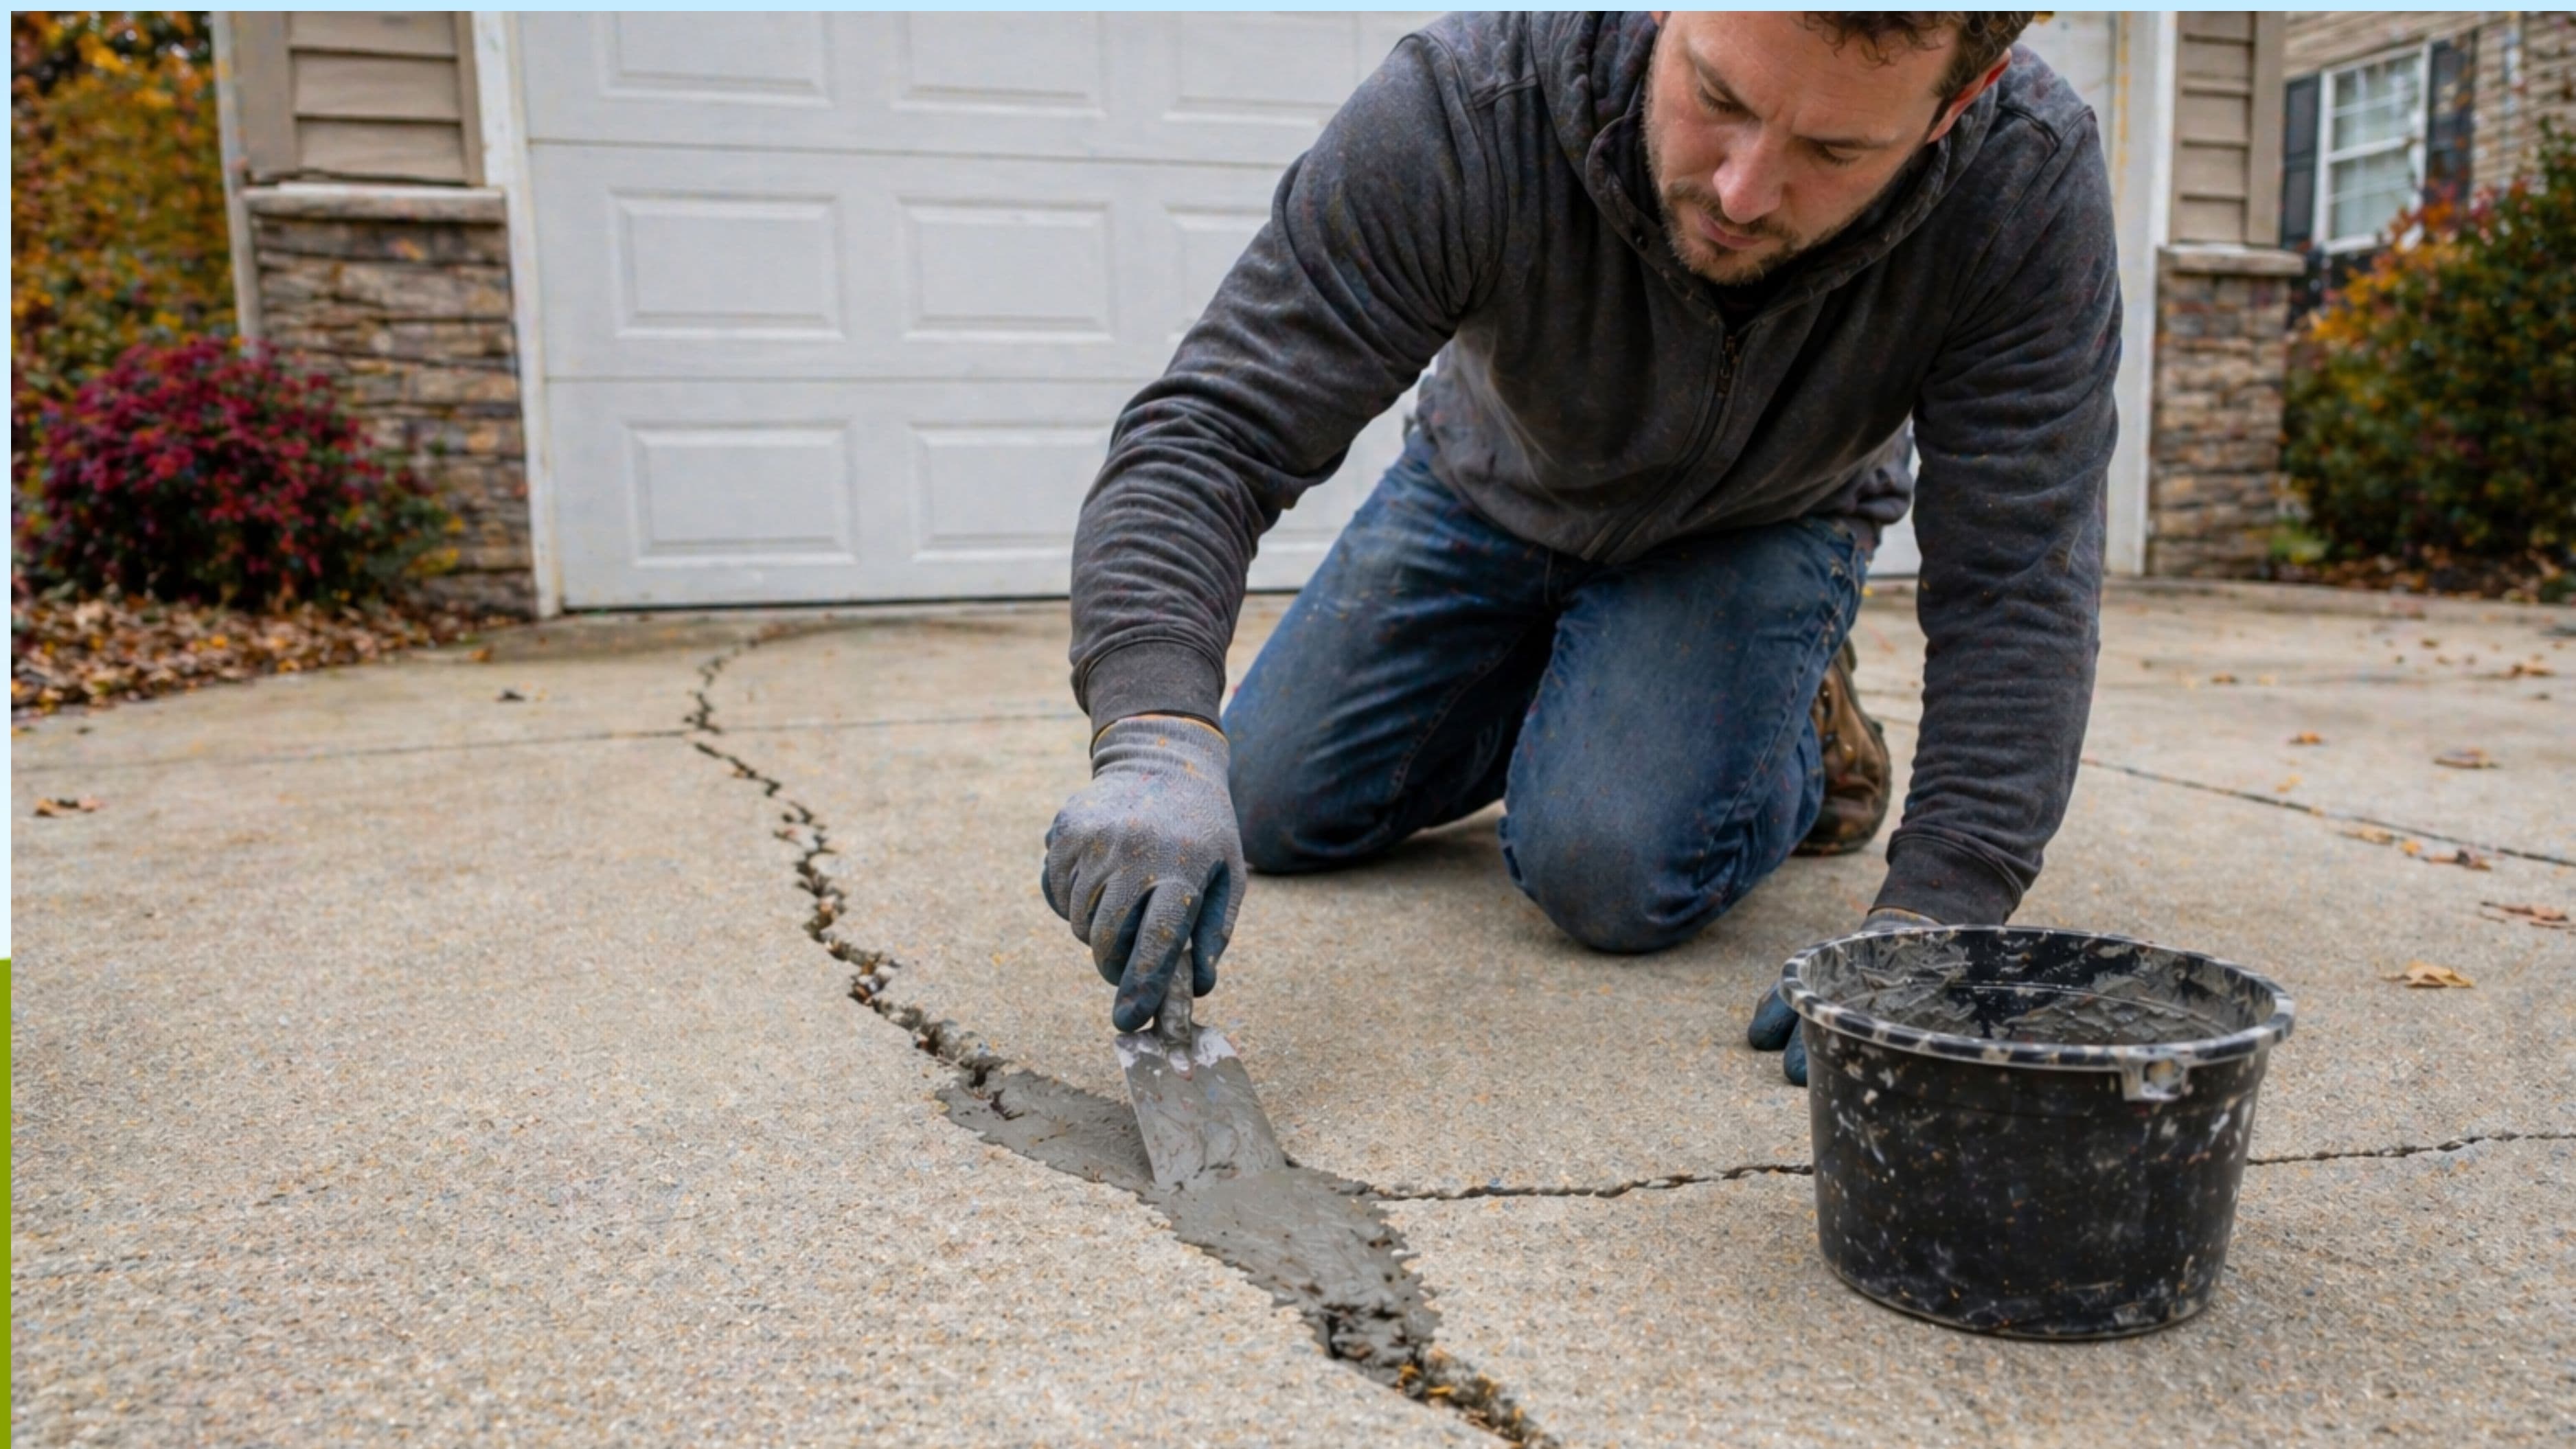
Start by using a cold chisel and hammer (or an angle grinder) to knock out any loose concrete along the crack edges. You want solid, stable edges on both sides – not crumbling concrete that will pop away from your repair under traffic or freeze-thaw stress. This process is called "keying" the crack, and it also slightly widens the crack opening, which sounds counterproductive but actually improves the mechanical bond of the filler.
Next, work a stiff wire brush vigorously along the full length of the crack, scrubbing out dirt, old crack filler, and loose particles. An angle grinder with a wire wheel attachment does this faster and more effectively than hand brushing if you have access to one. Work the brush into the crack itself, not just along the surface.
Blow out all debris with a leaf blower or compressed air. Follow up with a shop vac to pull out anything the blower missed. The crack interior should look visibly clean before you apply anything – no visible dirt, vegetation, or standing debris. If you find moss or plant growth at any point in the crack, apply a diluted bleach solution (10:1 water to bleach), scrub it out, and let it dry completely before proceeding.
Finally, let the crack dry fully. Moisture is the enemy of concrete repair adhesion. If you've recently had rain, wait 24–48 hours for the crack interior to dry out before applying any filler. In a pinch, a heat gun run slowly along the crack can accelerate surface drying, but deep moisture in the concrete itself takes longer to dissipate.
Step 2 – Prepare the Crack for Filling
For cracks wider than 1/4 inch and deeper than 1/2 inch, backer rod foam is worth using before applying filler. Backer rod is a closed-cell foam rope that gets pressed into the crack to a depth of about 1/4 to 3/8 inch below the surface, giving the filler a base to sit on and preventing it from sinking into a deep void. It also controls how much filler material you use, which matters for both cost and cure performance. Backer rod is sold by the roll at most hardware stores and costs $5–$10.
Press the backer rod into the crack using a putty knife or a dowel rod – it should sit firmly at a consistent depth and feel slightly compressed. If the crack is too narrow for backer rod, skip this step and proceed directly to filling.
For wider cracks (over 1/2 inch) that you're repairing with vinyl concrete patcher or hydraulic cement, apply a concrete bonding adhesive to the cleaned crack walls using a brush before mixing your repair material. This adhesive acts as a primer, dramatically improving the mechanical bond between old and new concrete. Follow the product instructions for dwell time – most bonding adhesives need 15–30 minutes to become tacky before you apply the patch material over them.
Step 3 – Apply the Repair Material
The application approach differs based on the product and crack size.
For Hairline to 1/4-Inch Cracks – Liquid Filler or Polyurethane Caulk
Liquid crack fillers (like Quikrete's Concrete Crack Seal) come in a bottle with a nozzle and are poured directly into the crack. Work slowly along the full length, slightly overfilling to account for settling as the material flows down into the crack. Allow it to settle for five minutes, then apply a second pass to bring the level flush with the surrounding surface. Use a putty knife to smooth the surface and feather the edges so there's no raised lip.
For polyurethane caulk-style fillers, cut the nozzle at a 45-degree angle to a diameter slightly smaller than the crack width. Apply in a steady bead, maintaining consistent pressure on the caulk gun. Tool immediately with a wet putty knife to smooth and slightly compress the filler into the crack. Wet-tooling (keeping the tool damp) prevents the material from sticking to the tool and helps produce a cleaner finish.
For 1/4-Inch to 1/2-Inch Cracks – Semi-Rigid Polyurethane Filler
Self-leveling polyurethane sealants (like Sikaflex Crack Flex) work well for this range. They remain slightly flexible after cure, which is important for cracks that may experience minor seasonal movement from freeze-thaw cycles. Apply in the same manner as standard caulk, slightly overfilling and then smoothing flush. Avoid applying when air or surface temperature is below 40°F – most polyurethane sealants don't cure properly in the cold.
For Wide or Deep Cracks – Vinyl Concrete Patcher
Mix the vinyl concrete patcher according to package instructions. Most products mix to a stiff, mortar-like consistency – not soupy. Add water incrementally and mix thoroughly until the material holds its shape without crumbling or flowing. Apply the mixed material to the crack using a margin trowel, pressing firmly to eliminate air pockets and ensure contact with the bonding adhesive on the crack walls.
Overfill slightly – about 1/4 inch proud of the surrounding surface – and then use the trowel to strike it flush, working in long, smooth strokes.
Feather the edges where the patch meets the existing concrete surface so there's no abrupt edge to catch water or snowplow blades.
Finish the surface texture to match the surrounding concrete if appearance matters to you. A stiff brush drawn across the fresh patch mimics a broom finish. A float worked in circles creates a smoother surface. Match what your existing driveway looks like for the best visual result.
Step 4 – Cure and Protect
Curing is where most DIY patches fail. Concrete repair materials need moisture to complete their chemical hardening process – and the instinct to let them air-dry quickly is the wrong one. Rapid surface drying causes shrinkage cracks in the fresh repair material.
Cover liquid-filled cracks with a strip of plastic sheeting or burlap for the first 24 hours if possible, particularly in hot or windy conditions that accelerate surface drying. For vinyl concrete patcher repairs, lightly mist the surface with water 2–3 times over the first 24 hours (this is called wet curing) and cover with plastic to retain moisture. Most manufacturers recommend keeping foot traffic off the repair for 24 hours and vehicle traffic off for 72 hours minimum.
Once fully cured, apply a penetrating concrete sealant to the entire driveway surface – not just the patched areas. A quality siloxane or silicone-based penetrating sealant (Rainguard or Foundation Armor make reliable products) soaks into the concrete and dramatically reduces water infiltration. This is the most cost-effective protection you can add before winter. A 5-gallon bucket covers most standard driveways and runs $40–$80. Apply on a dry day with temperatures above 50°F and allow 24 hours before precipitation is forecast.
Timing – When to Do This Job
The ideal window for driveway crack repair is late summer through mid-fall – when temperatures are consistently above 50°F during application and the following 24–48 hour cure period. Most concrete repair products require a minimum of 50°F to cure properly, and some polyurethane sealants need 40°F minimum. Check the product label for the specific temperature range before you start.
If you're reading this in October and temperatures in your area are already dropping into the 40s at night, prioritize the repair on a warm afternoon when the forecast shows at least two days of temperatures above 50°F. You're racing the calendar, but a properly executed repair in mid-October beats waiting until spring while freeze-thaw cycles expand your cracks through the winter.
If you've already had your first hard freeze, wait until spring. Applying repair materials to frozen or near-frozen concrete produces a bond failure – the patch may look fine initially and fall out by late spring. A temporary fix of packing the crack with sand to limit water infiltration is a better approach than a failed repair.
What to Avoid
Skipping the cleaning step and applying filler over debris is the most common reason DIY repairs fail before the following spring. The bond is everything. If the substrate isn't clean, dry, and sound, no amount of premium repair material compensates for it.
Using standard caulk rather than a concrete-specific product is another common shortcut that doesn't hold. Standard silicone or latex caulk doesn't bond adequately to concrete and doesn't handle the compressive forces of vehicle traffic. Use products specifically formulated for concrete repair.
Overmixing vinyl concrete patcher adds excess water, weakens the finished repair, and increases shrinkage cracking as it cures. Mix to the consistency described on the packaging – stiff, not pourable – and apply promptly.
Applying the repair on a hot, sunny day without wet-curing is a setup for surface cracking in the repair material itself. The sun and heat pull moisture out of the patch faster than the cement can use it for curing. Work in shade where possible and mist the surface as described.
Finally, don't skip the sealant step. Patching cracks without sealing the driveway surface leaves the concrete open to water infiltration everywhere except the specific spots you repaired. A good penetrating sealant applied after patching protects the entire surface through the freeze-thaw season.
When to Call a Professional
Most driveway crack repairs fall well within DIY capability. A few situations warrant professional assessment before you invest time and materials in a surface repair.
If you have significant vertical displacement between crack edges (one side of the crack sits more than 1/2 inch higher or lower than the other), the slab is settling unevenly due to subbase failure. Mudjacking or slab leveling before patching is the right sequence, and that's a job for a concrete contractor.
If more than 25–30% of your driveway surface shows cracking, spalling, or distress, a full resurfacing or replacement conversation is worth having before investing in individual crack repairs. At that scale, patching becomes a diminishing return.
And if cracks are reappearing in the same location season after season despite proper repairs, something is moving underneath – tree roots, poor drainage, or subbase issues – that a surface repair can't solve.
FAQ
How long will a DIY concrete crack repair last? A properly prepared and executed repair using quality materials in the right temperature window should last 3–7 years before requiring attention again, assuming normal vehicle traffic and reasonable freeze-thaw conditions. Sealing the driveway annually extends the life of both the repair and the surrounding concrete.
Can I repair concrete cracks when it's cold outside? Most products require a minimum of 40–50°F for proper curing. Below that threshold, the chemical curing process slows dramatically or stops, producing a weak bond that fails quickly. If temperatures are marginal, apply the repair in the warmest part of the day and cover with an insulating blanket or plastic sheeting overnight to retain heat during the initial cure window.
Is it better to seal the whole driveway or just the repaired areas? Always seal the whole driveway after repairs. A spot-sealed repair stands out visually and leaves the surrounding concrete unprotected. A full-surface penetrating sealant applied after patching provides uniform protection and improves the overall appearance of the repairs by reducing the contrast between new and old material.
What's the difference between concrete caulk and concrete patcher? Concrete caulk and polyurethane sealant are flexible after cure, making them appropriate for cracks that may move slightly with seasonal temperature changes. Concrete patcher (vinyl or epoxy-based) cures to a rigid, stone-like consistency similar to the surrounding concrete. Use flexible sealants for narrow, active cracks and concrete patcher for wider cracks or areas where a rigid, structural fill is appropriate.
Do I need to seal the driveway the same day I patch it? No – wait for the repair material to fully cure before applying sealant. For most products that means 24–72 hours minimum. Applying sealant over fresh, uncured repair material traps moisture and compromises both the repair cure and the sealant bond. Wait until the repair is fully hard and matches the gray color of cured concrete before sealing.
Getting this done before the first hard freeze is one of the highest-value maintenance tasks you can do for your property this fall. An hour of prep and an afternoon of work now prevents a significantly larger repair bill in the spring – and keeps your driveway looking like you take care of it, which you do.
📚 Sources
Concrete Crack Repair Guide – Portland Cement Association: https://www.cement.org/learn/concrete-technology/concrete-construction/crack-repair
Quikrete Vinyl Concrete Patcher Product Guide: https://www.quikrete.com/productlines/vinylconcretepatcher.asp
Sikaflex Concrete Crack Repair Technical Data: https://usa.sika.com/en/construction/concrete-repair.html
Freeze-Thaw Damage in Concrete – American Concrete Institute: https://www.concrete.org/topicsinconcrete/topicdetail.aspx?topicid=22
Concrete Sealer Selection Guide – Concrete Network: https://www.concretenetwork.com/concrete-sealer
DIY Concrete Repair Safety Guidelines – OSHA Construction: https://www.osha.gov/construction
🔍 Explore Related Topics