The honest answer is that patching makes sense far more often than most homeowners realize. Concrete is one of the most durable building materials available, and surface damage doesn't always mean structural failure. Understanding the difference between cosmetic deterioration and genuine structural compromise is what determines whether a $50 bag of patching compound fixes your problem or whether you're looking at a $3,000 pour.
This guide helps you make that call clearly, without guesswork.
Start Here: Surface Damage vs Structural Damage
The most important distinction in any concrete repair decision is whether you're dealing with surface damage or structural damage. They look similar from above, but they behave very differently and require completely different responses.
Surface damage includes shallow cracks (under ¼ inch wide and not deep), spalling (where the top layer flakes or chips away), minor scaling from freeze-thaw cycles or deicing salt, and small potholes or divots that don't penetrate the full slab depth. This kind of damage is cosmetic in most cases — it affects appearance and can worsen over time if left untreated, but it doesn't compromise the slab's load-bearing capacity or structural integrity.
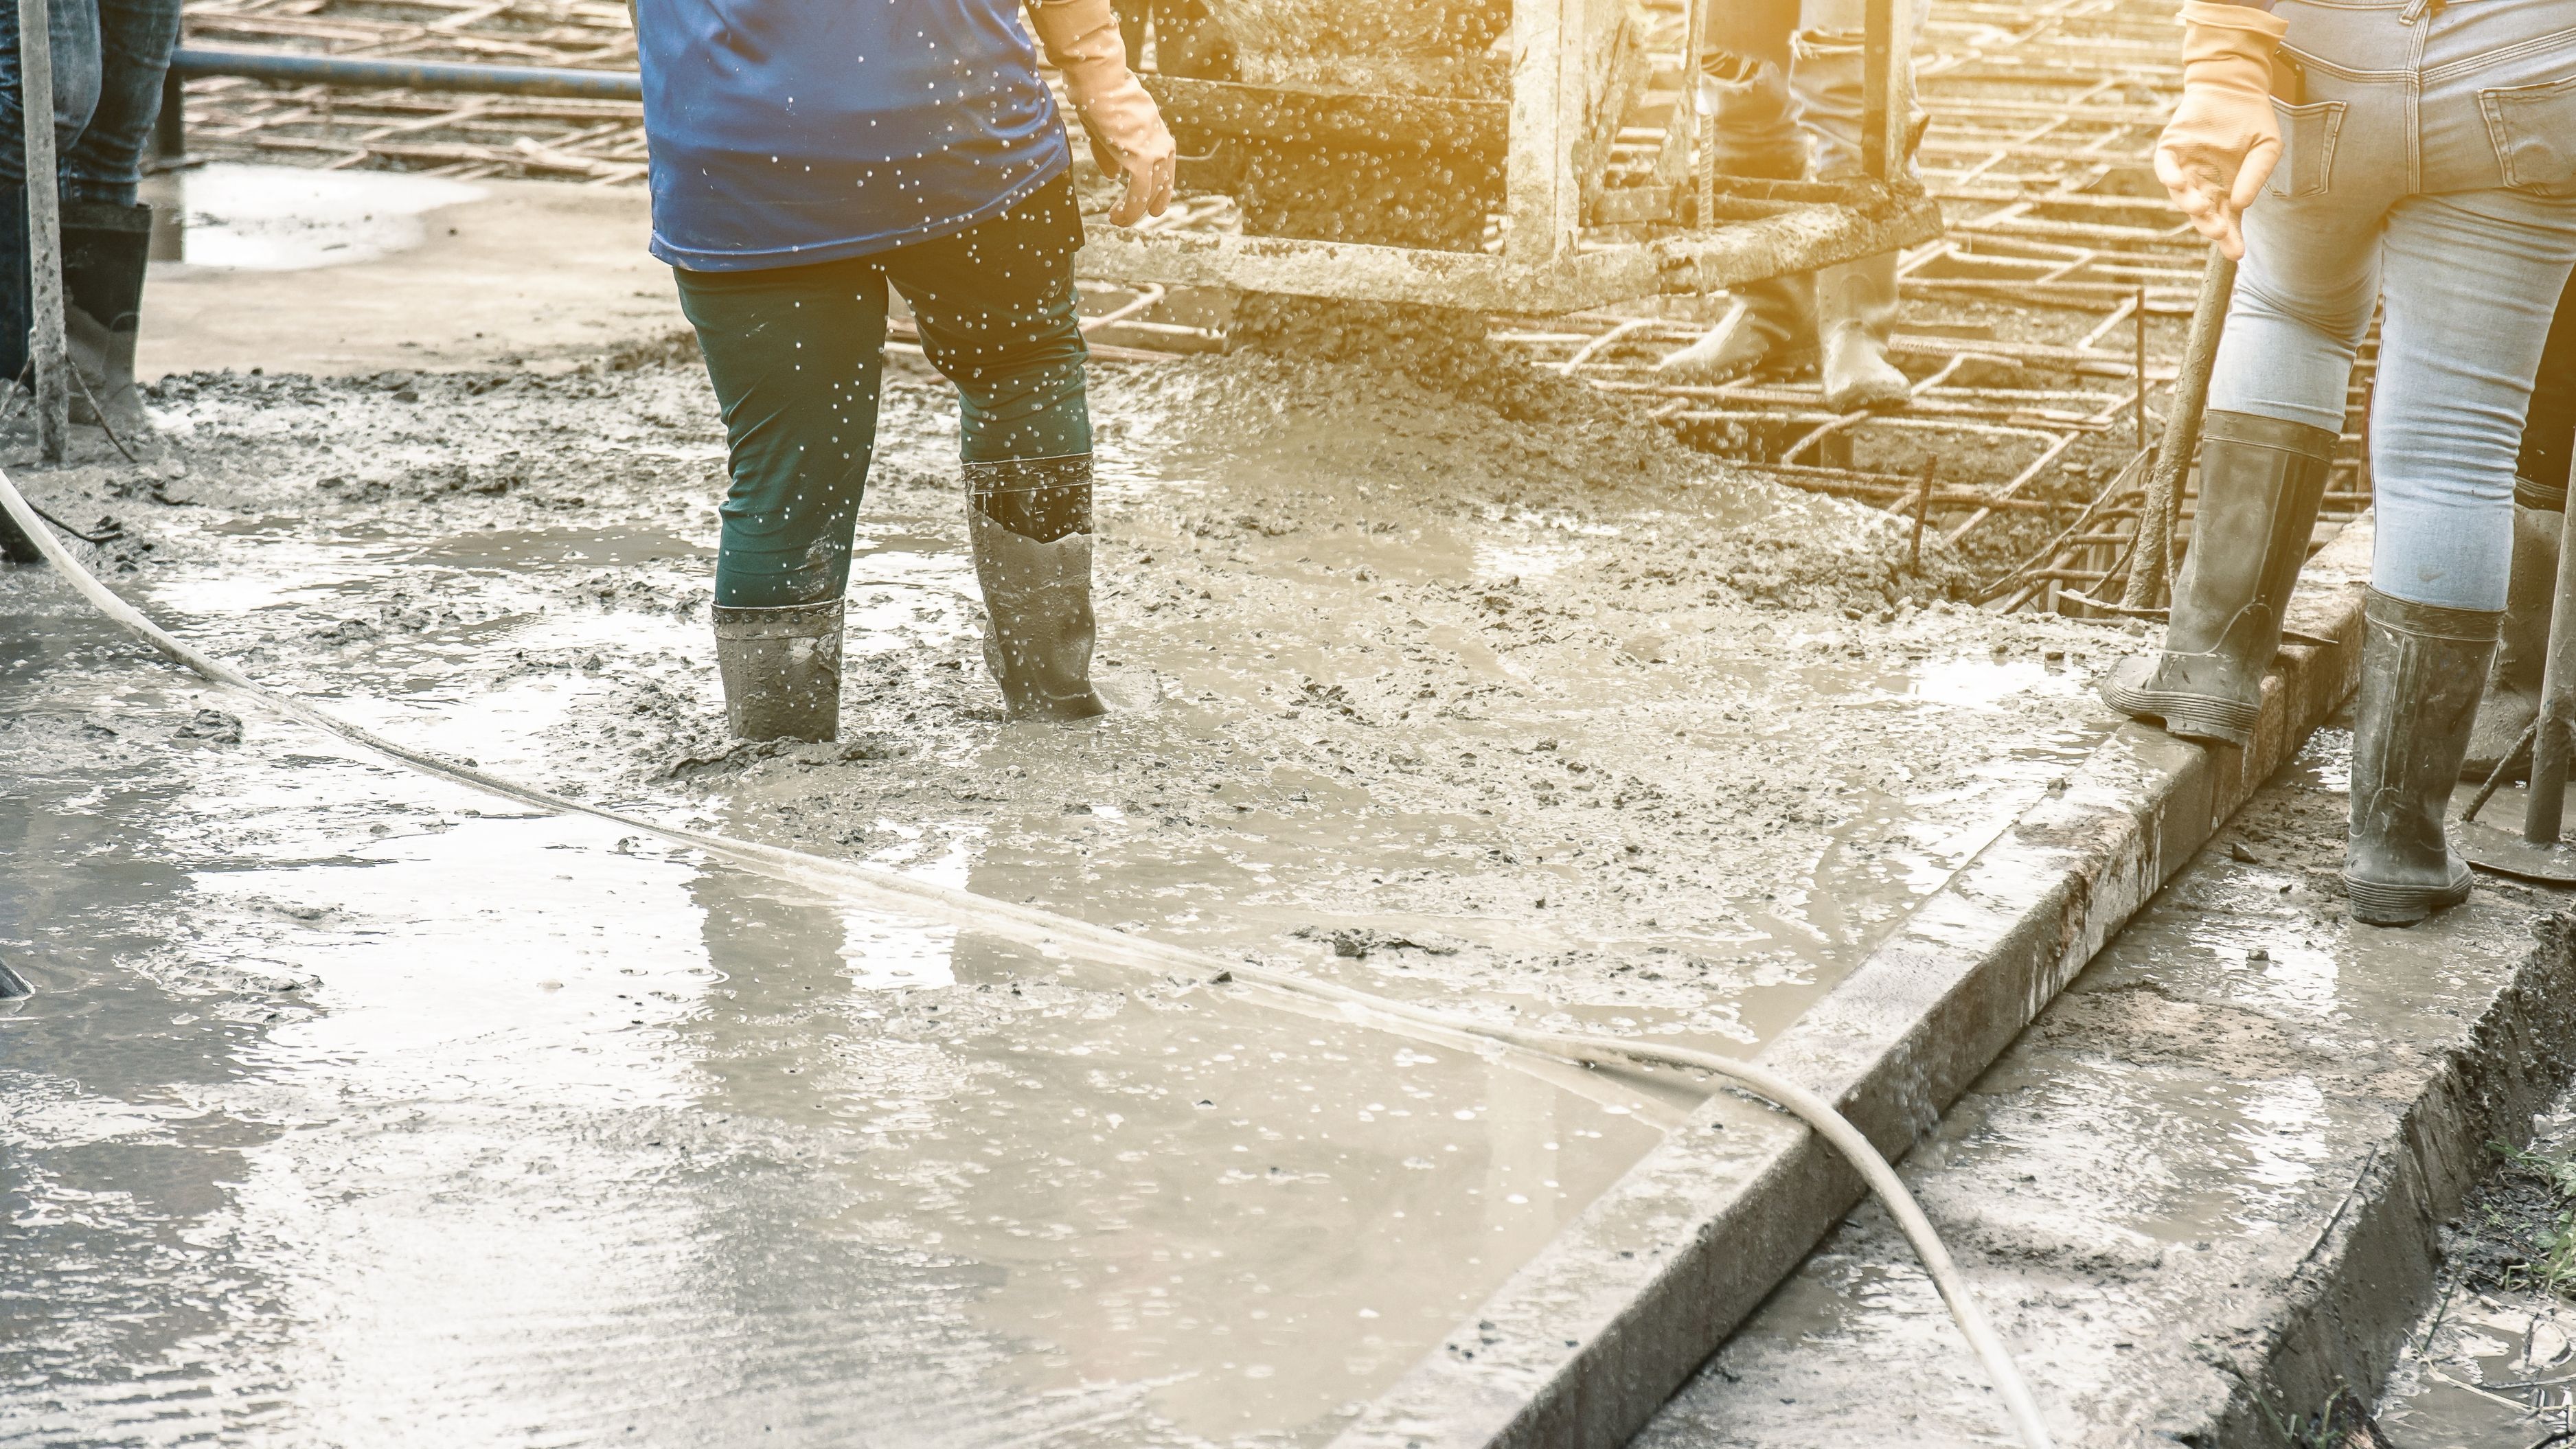
Structural damage includes cracks that go all the way through the slab, sections where one edge has shifted or heaved upward relative to the other (called differential settlement), large areas of crumbling or deteriorated concrete that no longer hold together under load, and slabs with significant voids underneath caused by soil erosion or washout. This kind of damage means the slab itself has failed or is failing — and patching the surface without addressing the underlying cause is a temporary fix that will fail again quickly.
Walk the damaged area and look carefully. Press down on both sides of a crack — if they flex or move independently, you have structural movement. Look for step cracks at control joints where one section sits higher than the other. If the slab sounds hollow when you knock on it, there may be voids beneath the surface. These are all signs that patching alone won't hold.
When Patching Is the Right Call
Patching is the right decision when the damage is limited in scope, the cause of the damage has either resolved itself or is addressable, and the rest of the slab is solid. Specifically, patching makes good sense in the following situations.
Small to medium cracks under ¼ inch wide. Hairline cracks and cracks up to ¼ inch are the bread and butter of concrete patching. They're typically caused by normal shrinkage as concrete cures, minor thermal expansion and contraction, or slight ground movement. As long as the two sides of the crack are at the same height and there's no ongoing movement, a polyurethane or epoxy crack filler seals them effectively and stops water infiltration — which is the main reason small cracks become big problems over time.
Spalling and surface scaling on otherwise solid slabs. Spalling — where the surface layer pops off in flakes or chunks — is common in cold climates where deicing salts and freeze-thaw cycles damage the top ½ to 1 inch of the slab. If the concrete beneath the spalled area is still dense and hard (test it by scratching with a nail — it should resist scratching, not crumble), a resurfacing compound or surface patch can restore both appearance and protection at a fraction of replacement cost.
Isolated potholes or impact damage. A single area of damage from a heavy dropped object, a tree root that's since been removed, or a pothole that developed from water infiltration can be patched cleanly if the surrounding concrete is intact. This is one of the clearest cases for patching — the damage is localized, the rest of the slab is fine, and there's no reason to replace anything beyond the damaged section.
Cosmetic repairs before sealing or coating. If you're planning to apply a concrete sealer, decorative coating, or epoxy floor finish, patching surface imperfections first is a necessary step. In this context, patching isn't a standalone repair decision — it's part of a larger maintenance sequence that extends the life of the whole surface.
When Repaving Makes More Sense
There are situations where patching is genuinely the wrong choice — not because the patch won't hold, but because the underlying condition means it won't hold for long, or because the scope of damage makes patching uneconomical.
Widespread cracking across more than 30–40% of the surface. A slab with cracks everywhere is telling you something about what happened under or within it. Widespread cracking often indicates that the original pour was too thin, the base wasn't properly prepared, or the concrete mix was poor. Patching a heavily cracked slab produces a patchwork surface that continues to crack between the patches. At that level of damage, replacement delivers better long-term value.
Differential settlement where sections have shifted vertically. When one side of a crack is higher than the other, it means the ground beneath has moved unevenly. Patching the crack doesn't fix the settlement — and the patch will crack again as movement continues. In these situations, you either need to address the cause of the settlement (often soil erosion, poor drainage, or tree root activity), consider mudjacking or slab lifting to re-level the sections, or replace the slab entirely.
Structural voids beneath the surface. A slab that sounds hollow in multiple areas has lost the soil support it depends on. Even if the surface looks intact, a slab with significant voids will crack and collapse under load over time. Patching the surface of an unsupported slab is wasted money. Mudjacking (pumping a grout mixture beneath the slab to fill voids and lift it back to level) is sometimes an option, but if the voids are extensive, replacement is the practical choice.
Concrete that crumbles or dusts when you press it. Concrete that has lost its structural integrity — where pressing on the surface produces dust or the material crumbles rather than resisting — has carbonated or suffered chemical deterioration past the point where patching adhesion is reliable. Patching compounds bond to solid concrete; they don't bond well to concrete that is itself deteriorating. Replacement is the right answer here.
The Cost Comparison
The financial case for patching versus repaving is significant, and it's worth understanding the real numbers before making a decision.
A standard driveway replacement — demolition, removal, new pour — typically runs $4 to $8 per square foot for a basic concrete finish, meaning a 400 square foot driveway costs $1,600 to $3,200 or more depending on your location, access, and thickness. Walkways and patios are similar or slightly less. These are not small expenses.
By contrast, patching materials are inexpensive. A 50-pound bag of concrete patching compound costs $15–$30 and covers several square feet at typical repair depths. Crack filler tubes run $5–$15 each. Even a larger resurfacing job using a bag-mixed overlay product — which can renew the appearance of an entire slab — typically costs $100–$300 in materials for a standard driveway. DIY labor is the main time investment, not dollars.
Professional concrete patching runs $200–$500 for typical crack repair and small area patching — a fraction of full replacement cost. Even at the high end of professional patch repair pricing, you're saving thousands compared to a new pour when the underlying slab is sound.
The math is clear: if a patch will hold for 5–10 years because the slab is structurally sound, it's almost always the right financial decision. If a patch fails in 6 months because the underlying cause wasn't addressed, you've spent money twice.
How to Patch Concrete Correctly
A patched repair fails most often because the preparation was inadequate, not because the patching material was wrong. Here's how to do it right.
Clean the area thoroughly. Remove all loose concrete, dirt, oil, and debris from the repair area. Use a wire brush, angle grinder with a diamond cup wheel, or cold chisel and hammer to clean the edges of the crack or damaged area down to solid concrete. Vacuum out all dust. If there's oil staining, degrease the area and allow it to dry fully — patching compound won't bond to oily surfaces.
Undercut the edges if you're patching a larger area. For potholes or spalled sections, the repair holds better if the edges of the damaged area are cut at a slight inward angle (undercut) so the patch material is mechanically locked in place rather than just sitting in a flat-bottomed hole. A circular saw with a diamond blade or an angle grinder handles this well.
Use the right patching product for the job. Hairline cracks do best with a liquid crack filler or self-leveling polyurethane caulk. Cracks up to ½ inch wide use hydraulic cement or a vinyl concrete patcher. Larger structural patches and resurfacing jobs call for a polymer-modified concrete mix, which bonds well to existing concrete and handles load. Match the product to the depth and size of the repair.
Apply a bonding agent for larger patches. On any patch area larger than a few square inches, applying a concrete bonding adhesive to the clean repair area before placing your patch material significantly improves adhesion. This is one of the most commonly skipped steps and one of the most important ones for patch longevity.
Cure it properly. Keep the patched area moist for at least 24–48 hours after repair — cover it with plastic sheeting or damp burlap. Concrete that dries too fast develops surface cracks and weakens the repair. Don't let anyone walk or drive on the repair for the curing time specified on the product label, which is typically 24–72 hours for foot traffic and longer for vehicle loads.
Common Mistakes to Avoid
Don't patch over a wet surface. Moisture in the repair area prevents proper bonding. Wait for the concrete to be damp but surface-dry before applying patching material.
Don't use regular mortar or standard concrete mix for thin repairs. Standard concrete mix needs to be at least 2 inches thick to cure and bond properly. For repairs under 2 inches deep, use a purpose-made concrete patching compound or polymer overlay, which is engineered to perform in thin sections.
Don't ignore the cause of the damage. A crack that was caused by a tree root, persistent water runoff, or soil that's still settling will crack again after patching if the underlying cause isn't addressed. Patching is a surface fix — it doesn't solve drainage problems, root pressure, or base failures.
Don't patch in freezing temperatures. Concrete patching compounds won't cure properly below about 40°F. In cold climates, wait for a stretch of warmer weather or use a heated enclosure to keep the repair area above the minimum curing temperature.
When to Call a Professional
Most small to medium concrete patches are solidly within DIY territory. The tools are basic, the materials are available at any hardware store, and the technique is learnable. However, there are situations where a professional assessment is worth the cost before you spend money on either patching or replacement.
If you're unsure whether differential settlement is still occurring, a contractor can assess the site and identify whether the movement is active or historic. If there's any indication of underground water movement — persistent wet areas, soil washout, or erosion near the slab edges — a drainage assessment should happen before any repair. And if you're dealing with a large structural failure (a slab that's visibly sunk, tilted, or extensively cracked across a large area), getting a quote for mudjacking versus replacement from a qualified concrete contractor gives you real cost numbers to compare.
Concrete work is one area where getting a second opinion before committing to full replacement can save significant money — especially if a slab lift or targeted repair turns out to be viable.
FAQ
How long does a concrete patch last? A well-prepared patch on structurally sound concrete can last 10–20 years or longer, particularly if the repair area is sealed afterward. Poor preparation, ongoing movement, or the wrong product for the application will shorten that significantly. The preparation matters more than the product.
Can I patch a driveway that has dozens of small cracks? You can, but at some point the effort and materials approach the cost of a full resurface rather than individual crack repairs. If your driveway has widespread but shallow cracking, a concrete resurfacing overlay — applied over the entire surface after filling the larger cracks — is often more efficient and produces a better-looking result than filling each crack individually.
My sidewalk panel has lifted on one side. Can I grind down the high edge instead of replacing it? Yes — this is called concrete grinding or trip hazard repair, and it's a legitimate and widely used fix for sidewalk lips and edges that have heaved from tree roots or frost. It's cheaper than panel replacement and produces a smooth, safe transition. The limitation is that grinding only works when the height difference is 1–2 inches or less; larger differentials typically require panel replacement.
Does patching concrete affect home value or sale? Neatly patched and sealed concrete looks significantly better than cracked and spalled concrete, and buyers notice. A clean concrete surface — even a patched one — generally doesn't hurt a sale. A badly deteriorated driveway or patio that looks neglected can create a negative impression that a modest repair investment would have prevented.
Concrete is remarkably fixable when you catch problems early and address them correctly. The key is being honest about what you're looking at — surface damage on a solid slab is a patch job, and a good one will last for years. Structural failure or widespread deterioration is a different conversation. Know which one you have, and the decision almost makes itself.
📚 Sources
Family Handyman – How to Repair Concrete: https://www.familyhandyman.com/project/how-to-repair-concrete/
Bob Vila – Concrete Repair Guide: https://www.bobvila.com/articles/how-to-repair-concrete/
This Old House – How to Resurface a Concrete Driveway: https://www.thisoldhouse.com/driveways/21016168/how-to-resurface-a-concrete-driveway
HomeAdvisor – Concrete Repair Cost Guide: https://www.homeadvisor.com/cost/outdoor-living/repair-concrete/
Portland Cement Association – Concrete Repair Guide: https://www.cement.org/learn/concrete-technology/concrete-durability/concrete-crack-repair
University of Minnesota Extension – Concrete Driveway Maintenance: https://extension.umn.edu/yard-and-garden/concrete-driveway-maintenance
🔍 Explore Related Topics