The key is knowing which type of damage you're dealing with, choosing the right patching product, and doing the prep work properly. Skip the prep and the repair fails inside a season. Do it right and a concrete resurfacing job can hold up for ten years or more.
What You'll Need
Materials:
Concrete patching compound or vinyl concrete patcher (Quikrete Vinyl Concrete Patcher and Sakrete Top 'N Bond are both well-regarded for step repairs)
Concrete bonding adhesive (liquid, brush-on type – Quikrete Concrete Bonding Adhesive or similar)
Concrete sealer (optional but recommended for longevity)
Plastic sheeting or trash bags for curing
Tools:
Cold chisel and hammer (or an angle grinder with a diamond cup wheel for larger areas)
Wire brush
Pressure washer or garden hose with strong spray nozzle
Shop vacuum
Margin trowel or finishing trowel
Bucket and mixing paddle (or a drill with a mixing bit)
Stiff paintbrush (for bonding adhesive application)
Work gloves and safety glasses
Estimated cost: $30–$60 for materials depending on the extent of damage and how many steps need attention. A 50-pound bag of Quikrete Vinyl Concrete Patcher covers roughly 1–2 square feet at a 1-inch depth – measure your repair areas and plan accordingly.
Estimated time: 2–4 hours of active work, plus 24–48 hours of curing time before walking on the steps and up to 7 days before heavy use.
Difficulty level: Beginner to intermediate. The work is physical but the technique is straightforward.
Step 1: Assess the Damage Honestly
Before you buy anything or pick up a tool, spend a few minutes understanding what you're actually dealing with. Concrete step repairs fall into two broad categories, and they require slightly different approaches.
Surface spalling and shallow crumbling is the most common issue – the top 1/4 to 1 inch of the concrete surface breaks down due to freeze-thaw cycling, deicing salt damage, or age. The step looks rough and flaky but the underlying concrete is still solid. This is the easiest repair to do yourself and the one this guide primarily addresses.
Edge and corner damage is the second most common issue – corners chip off, the front edge of a tread breaks away, or an entire nosing section is missing. This is still very much a DIY repair, but it requires building a form to hold the patching compound in shape while it cures. More on that below.
Deep structural damage – cracks running all the way through a step, significant settlement where one step has dropped relative to another, or steps that rock or shift when you stand on them – is a different situation. Surface patching won't fix a structural problem, and in that case a professional evaluation is worth getting before you invest in repairs.
Do the knock test: tap the surface firmly with a coin or the handle of a screwdriver. A solid thud means sound concrete underneath. A hollow ring means the surface is delaminated and that section needs to come out. Mark hollow areas with chalk before you start.
Step 2: Remove All Loose and Deteriorated Concrete
This is the step most people rush, and it's the reason most DIY concrete repairs fail prematurely. Patching compound cannot bond to crumbling, dusty, or weak concrete. Every bit of loose material has to come out before the new product goes in.
Use a cold chisel and hammer to chip away everything that's loose or hollow – anything that doesn't feel firmly attached to the substrate beneath it. Work methodically across the repair area and don't be shy about removing material that seems marginal. The goal is to get down to concrete that's genuinely solid. If you're dealing with larger areas of surface deterioration, an angle grinder with a diamond cup wheel makes faster work of it and creates a better bonding profile.
For edges and corners, chip back to solid concrete even if that means the repair area is larger than the visible damage. A patch that has a feathered edge at zero depth will always fail at that edge first. Aim for a minimum repair depth of 1/4 inch across the entire repair area – this gives the patching compound enough thickness to bond and hold.
Once you've chipped everything loose, go over the area with a wire brush to remove surface dust and concrete powder. Then clean the repair area thoroughly with a pressure washer or a strong hose spray. All dust, debris, and residue needs to be gone. Let the concrete dry completely – overnight is ideal, a minimum of a few hours in warm weather. The surface should be damp when you apply bonding adhesive, not wet, and definitely not soaking.
Step 3: Apply Concrete Bonding Adhesive
Bonding adhesive is the bridge between your old concrete and the new patch. It dramatically improves adhesion and significantly extends the life of the repair. Don't skip it – it costs about $8 and is one of the highest-value steps in the whole process.
Brush the bonding adhesive generously onto all surfaces that the patching compound will contact – the bottom of the repair area and the sides. Use a stiff paintbrush and work it into any texture or roughness in the concrete. Allow the adhesive to become tacky before applying the patch – this typically takes 20–30 minutes depending on temperature and humidity. The surface should feel sticky to the touch, not wet. If it dries completely past the tacky stage, apply a second coat and wait again.
Step 4: Mix Your Patching Compound
Follow the manufacturer's mixing instructions on your chosen product exactly. Adding too much water is the most common mixing mistake – it weakens the final product significantly and increases shrinkage cracking. The mix should be the consistency of thick peanut butter: workable but not soupy, holding its shape when you scoop it.
Mix in small batches if you're working on multiple areas, especially in warm weather when working time is shorter. Most vinyl concrete patchers have a working time of 20–30 minutes before they start to set. If the mix starts to stiffen in the bucket, don't add water to re-loosen it – that batch is done, and you'll need to mix fresh.
For edge and corner repairs where you need to hold the patch in shape, cut a piece of scrap wood or a sturdy cardboard strip to the profile of the step and tape or prop it against the front face as a form. The form needs to extend slightly below the step nosing and be held flush with the front face of the step. Coat the form lightly with vegetable oil or petroleum jelly so it releases cleanly after the patch cures.
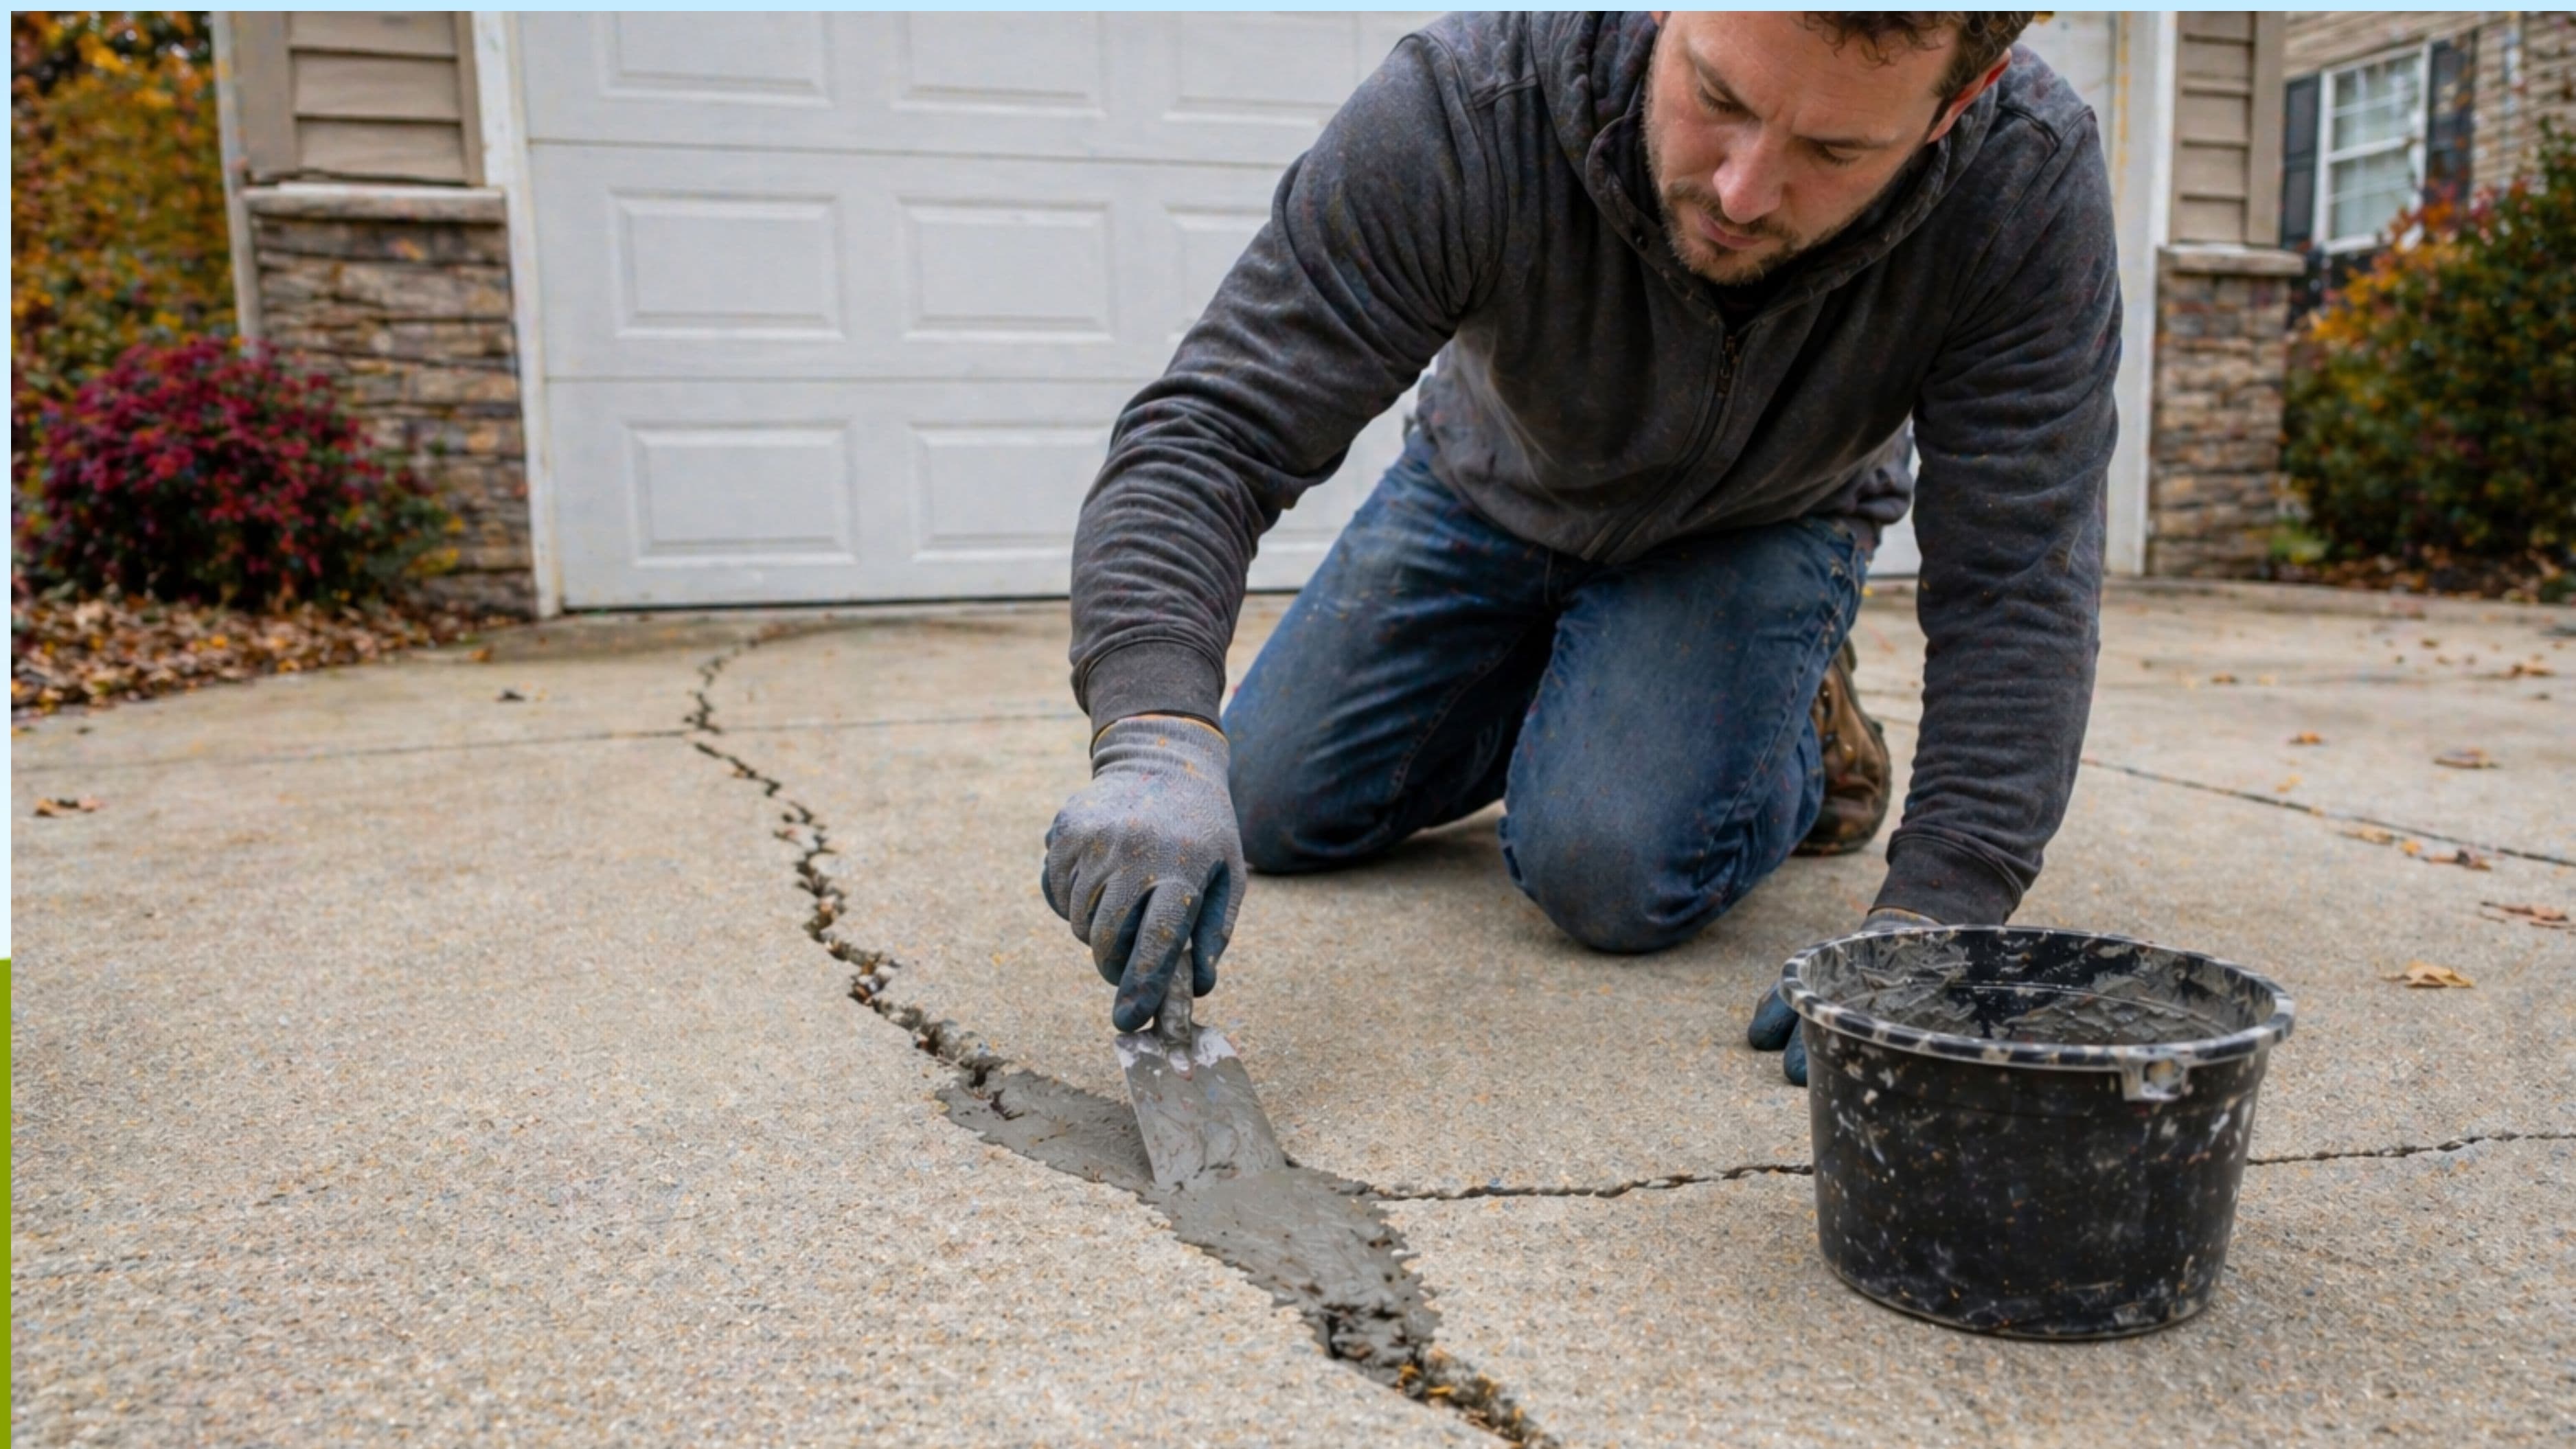
Step 5: Apply the Patch
Work the patching compound firmly into the repair area using a margin trowel or a stiff putty knife. Press it in with real pressure to eliminate air voids and ensure contact with the bonding adhesive on all surfaces – don't just lay it on top. Fill the area slightly proud (a little above the surrounding surface level) to allow for a small amount of shrinkage as it cures.
For surface areas, use the trowel to bring the patch flush with the surrounding concrete. Work in smooth, deliberate strokes. You don't need a perfectly smooth finish – a slightly textured surface is actually safer on steps than a slick one. If you want a more uniform texture that blends with the existing concrete, you can lightly drag a stiff brush across the surface while it's still workable.
For edge repairs with a form in place, pack the compound in firmly, work out air pockets with the trowel, and smooth the top surface. Leave the form in place for at least 24 hours before removing it.
On large surface repairs, work in sections rather than trying to cover the entire area at once. Seams between sections are fine as long as you work them together while both sections are still fresh.
Step 6: Cure Properly
Curing is where a lot of DIY concrete repairs come up short. Concrete and patching compounds need moisture to cure correctly – if they dry out too fast, you get a weak, brittle result that cracks early. In warm or windy weather, this happens faster than you'd expect.
Once the patch is finished and starting to firm up (typically 1–2 hours after application), mist it lightly with water and cover it with plastic sheeting weighted down at the edges to trap moisture. Keep it covered for at least 24 hours, and longer in hot or dry conditions. In cool weather (below 50°F), curing slows significantly – if temperatures are going to drop below freezing overnight, delay the repair or take steps to keep the area warm during curing, such as covering with insulating blankets.
Remove forms after 24 hours. Keep foot traffic off the repaired steps for at least 24–48 hours, and avoid heavy use for the first week to give the patch maximum time to develop strength.
Step 7: Seal the Surface (Optional but Recommended)
Once the patch has cured for at least 7 days, applying a penetrating concrete sealer to the entire step surface is the single best thing you can do to extend the life of both the repair and the surrounding concrete. Sealer reduces water infiltration, which is the primary driver of freeze-thaw damage and the reason the steps crumbled in the first place.
A quart of penetrating concrete sealer costs $15–$25 and covers several steps. Apply with a brush or roller in a thin, even coat and allow to dry before use. Reapply every 2–3 years as part of routine maintenance.
Safety Notes
Concrete dust contains crystalline silica, which is a respiratory hazard when inhaled in quantity. Wear a dust mask or N95 respirator during chipping and grinding work, particularly when using power tools. Safety glasses are non-negotiable during any chipping work – concrete fragments travel fast and far.
Wear work gloves throughout. Concrete patching compounds are alkaline and prolonged skin contact causes irritation and can lead to chemical burns with extended exposure.
If the steps in question are your main entry or exit point, set up a temporary step or ramp for the curing period so you're not walking on fresh work or navigating without a safe path.
Common Mistakes to Avoid
Patching over loose concrete is the biggest error and the one that guarantees failure. If the surface isn't fully sound beneath the patch, the patch fails with it. Be thorough and ruthless with removal.
Skipping the bonding adhesive saves five minutes and costs you years of repair life. It's not optional.
Using the wrong product matters more than most people realize. Standard pre-mixed concrete or hydraulic cement are not the right choice for thin surface repairs – they don't bond well in thin sections. Vinyl concrete patcher or polymer-modified patching compounds are formulated specifically for this application and are what the repair calls for.
Applying the patch in freezing temperatures without protection will result in a failed repair. Concrete and patching compounds cannot cure below 40°F. If it's cold, wait for warmer conditions or create a heated enclosure around the repair area.
Finally, feathering the edges to zero – tapering the patch to nothing at the perimeter – creates a weak edge that lifts and peels quickly. Cut a clean edge at least 1/4 inch deep around the repair perimeter so the patch has consistent thickness all the way to the boundary.
When to Call a Professional
If the concrete steps have structural cracks running all the way through the material, if individual steps have shifted or settled unevenly, or if the steps are attached to a foundation wall and showing movement, surface repair isn't the right solution. A structural concrete repair or step replacement by a masonry contractor is the appropriate path. Getting a professional assessment first saves you the cost of a repair that won't hold.
Also worth calling a pro: if your steps are very large, multiple flights, or load-bearing in a structural sense (attached to a porch or deck framing), the scope of work and safety implications go beyond what a DIY patch addresses.
FAQ
How long will a DIY concrete step repair last? A well-done repair using proper bonding adhesive and a quality vinyl concrete patcher can last 10 years or more, especially if you seal the surface afterward and reapply sealer every few years. The biggest variables are climate (freeze-thaw cycling accelerates deterioration), salt exposure (deicing salts are very hard on concrete), and how thoroughly the prep work was done.
Can I use regular concrete mix instead of patching compound? Standard concrete mix is not suitable for thin patch repairs. It doesn't bond reliably in thin sections and has too much shrinkage. Vinyl concrete patcher and polymer-modified patching products are specifically formulated for the bond strength and flexibility that repair work requires. The cost difference is minimal.
The damage is pretty extensive – can I resurface the entire step instead of patching? Yes – if the underlying structure is sound but the surface is broadly deteriorated, a full resurfacing with a product like Quikrete Re-Cap Concrete Resurfacer can restore the appearance and durability of the entire step in one application. This is typically more economical than patching multiple areas individually and gives a more uniform finished look. Application process is similar to patching but involves covering the entire surface rather than spot repairs.
My steps are painted. Do I need to remove the paint first? Yes. Patching compound cannot bond through paint. Strip or grind off any painted areas in the repair zone before applying bonding adhesive and patch material.
How do I match the color of the patch to the existing concrete? A perfect color match on old concrete is difficult – weathered concrete has irregular coloring that new material can't replicate exactly. The patch will typically be lighter than the surrounding concrete when first applied and darken slightly as it cures and weathers. Applying a concrete stain or sealer over the entire step surface after the repair cures can help unify the appearance. Over time, the patch weathers to blend more naturally with the surrounding concrete.
📚 Sources
Quikrete – Vinyl Concrete Patcher Product Guide: https://www.quikrete.com/productlines/vinylconcretepatcher.asp
Portland Cement Association – Concrete Repair and Restoration: https://www.cement.org/learn/concrete-technology/concrete-construction/concrete-repair
This Old House – How to Repair Concrete Steps: https://www.thisoldhouse.com/concrete/21015085/how-to-repair-concrete-steps
Family Handyman – Concrete Step Repair: https://www.familyhandyman.com/project/concrete-step-repair/
CDC/NIOSH – Silica Dust Hazards in Construction: https://www.cdc.gov/niosh/topics/silica/default.html
🔍 Explore Related Topics