This guide breaks down the most practical wall storage systems for home workshops, what each one costs, what it's best suited for, and how to choose the right combination for your space.
Why Wall Storage Makes or Breaks a Workshop
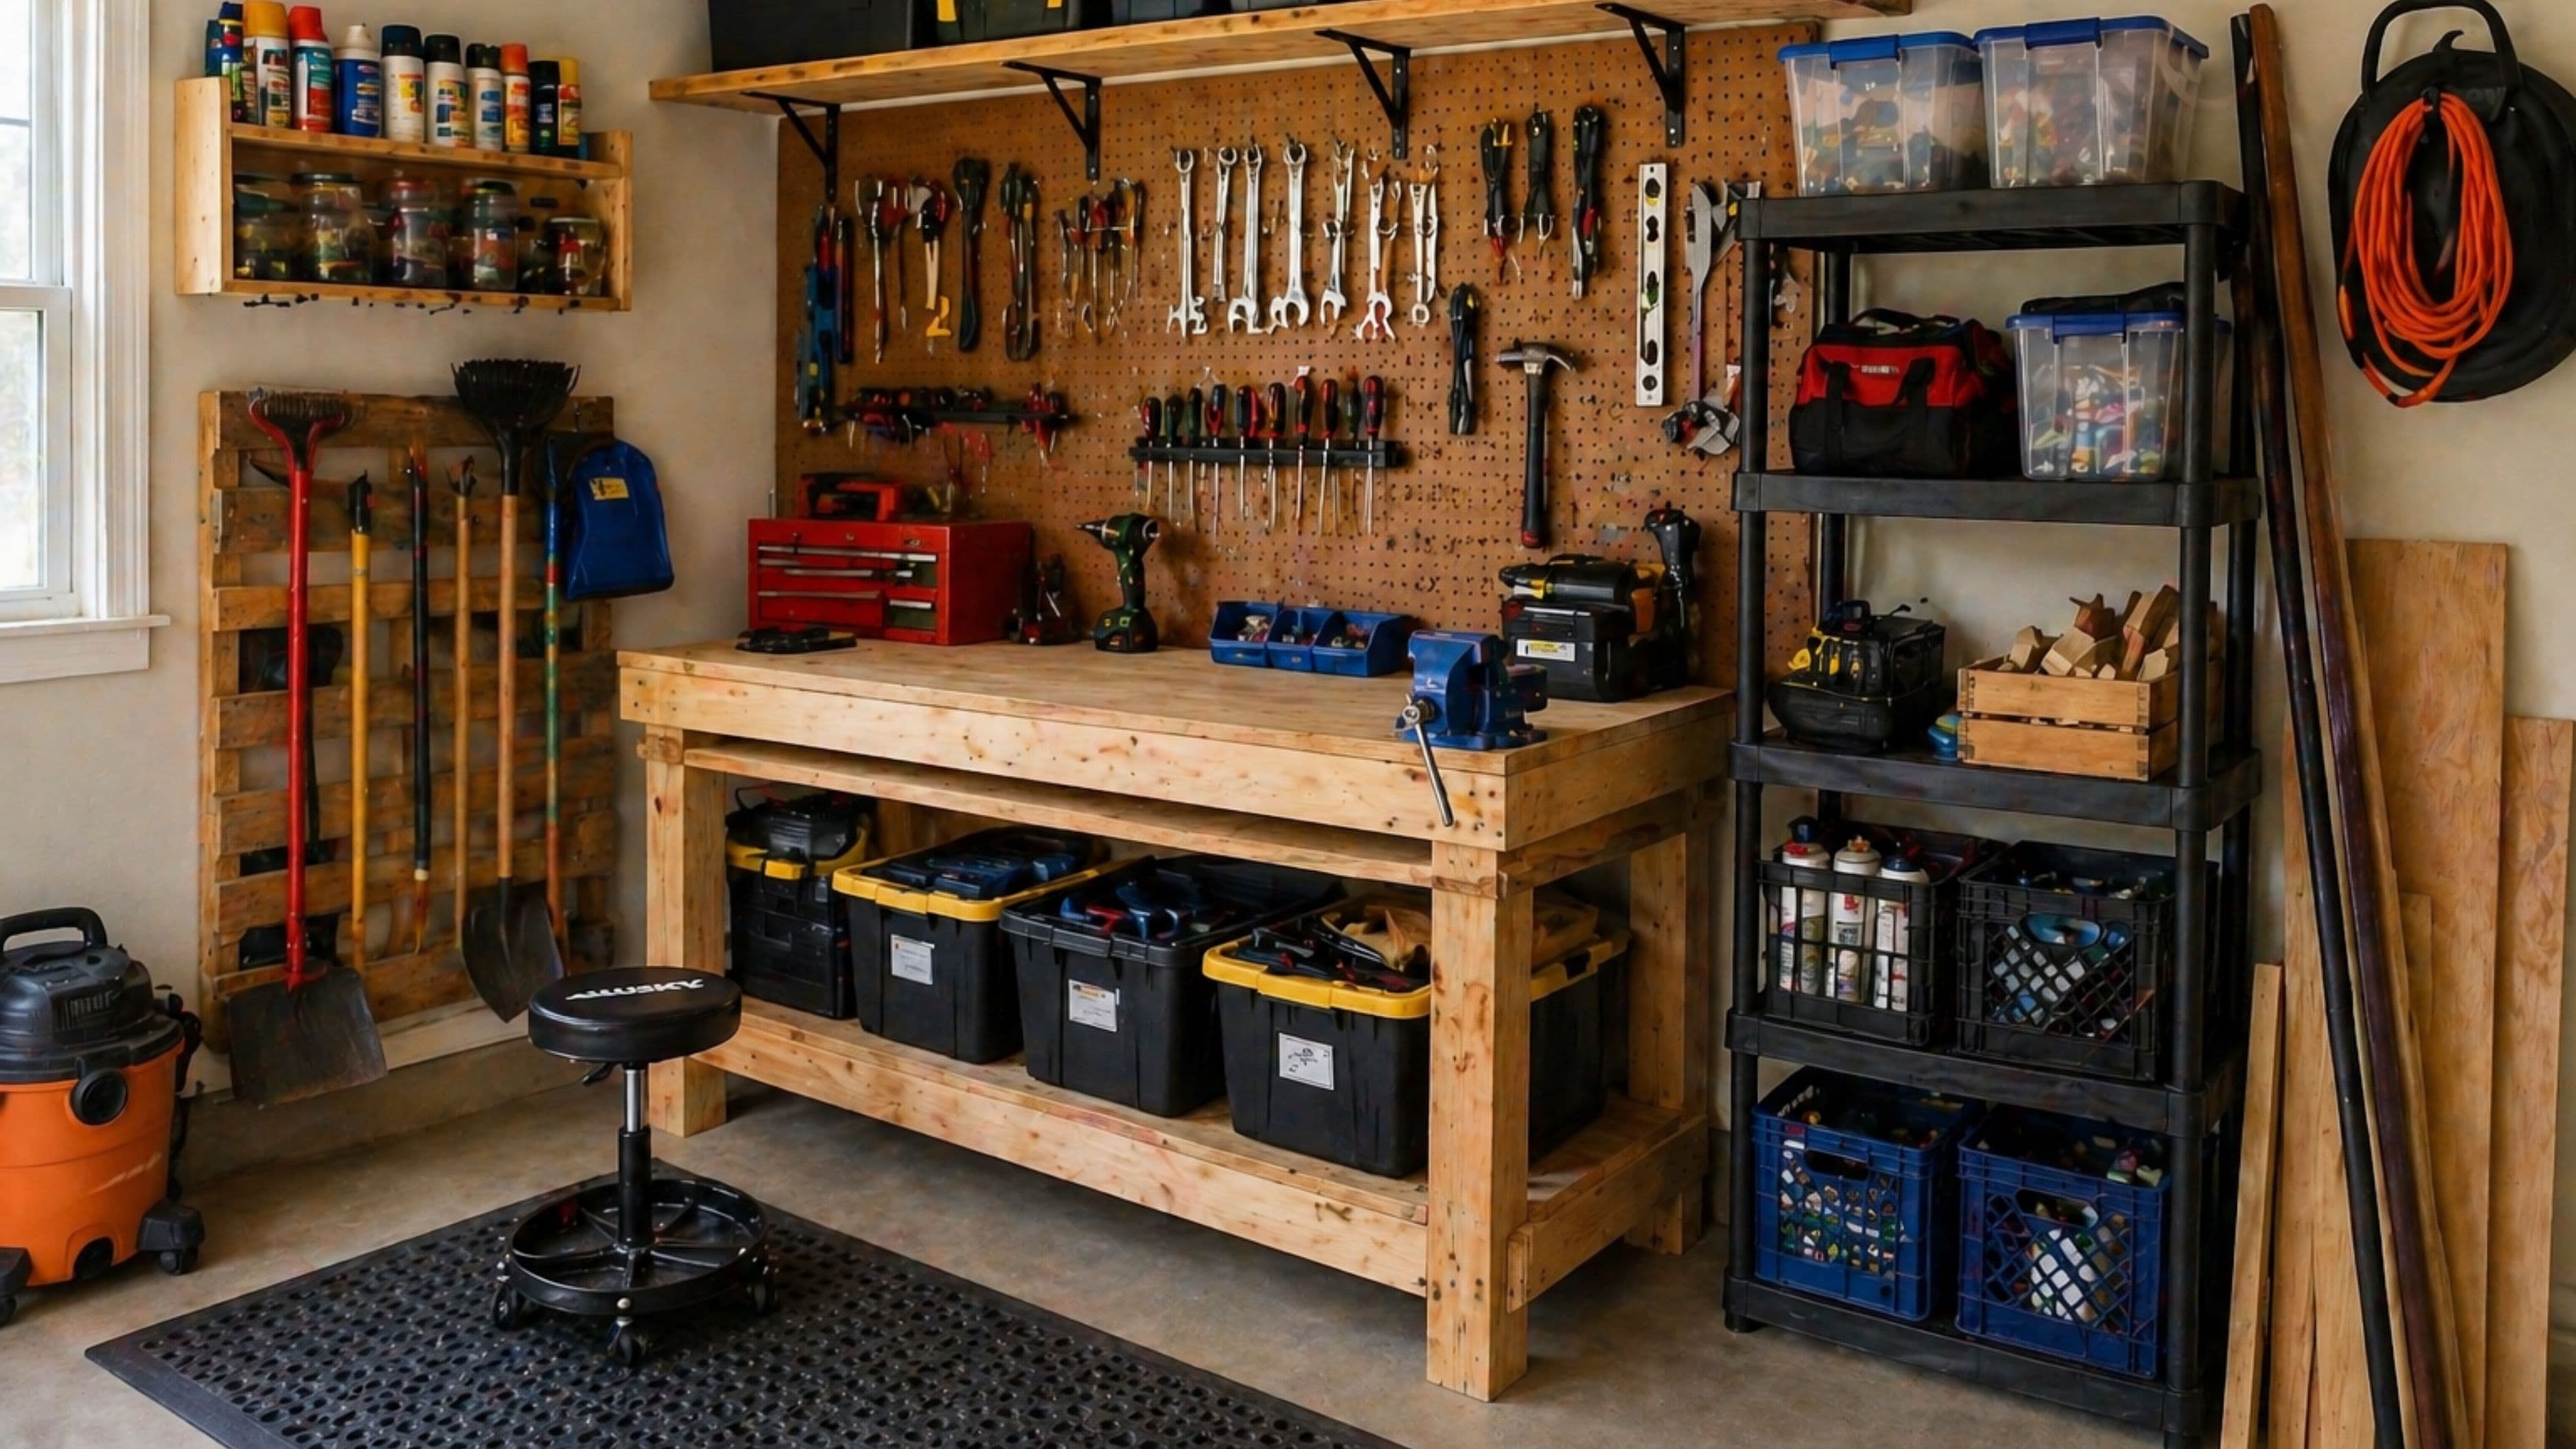
Most workshop problems come back to one thing: tools end up on flat surfaces because there's no better place for them. Workbenches become dumping grounds, floor space gets used for things that should be stored, and eventually you're working in a cluttered space that slows everything down. Wall storage solves this by turning unused vertical space into organized, accessible storage – keeping your work surface clear and your tools where you can find them in seconds.
The key is choosing systems that match what you're storing. A single wall storage approach rarely works for an entire workshop. Most functional setups combine two or three complementary systems: one for hand tools and small items, one for shelving and bins, and often one for specific tool categories like clamps, lumber, or power tools. Understanding each option makes it easy to build a wall storage plan that actually works for how you use your shop.
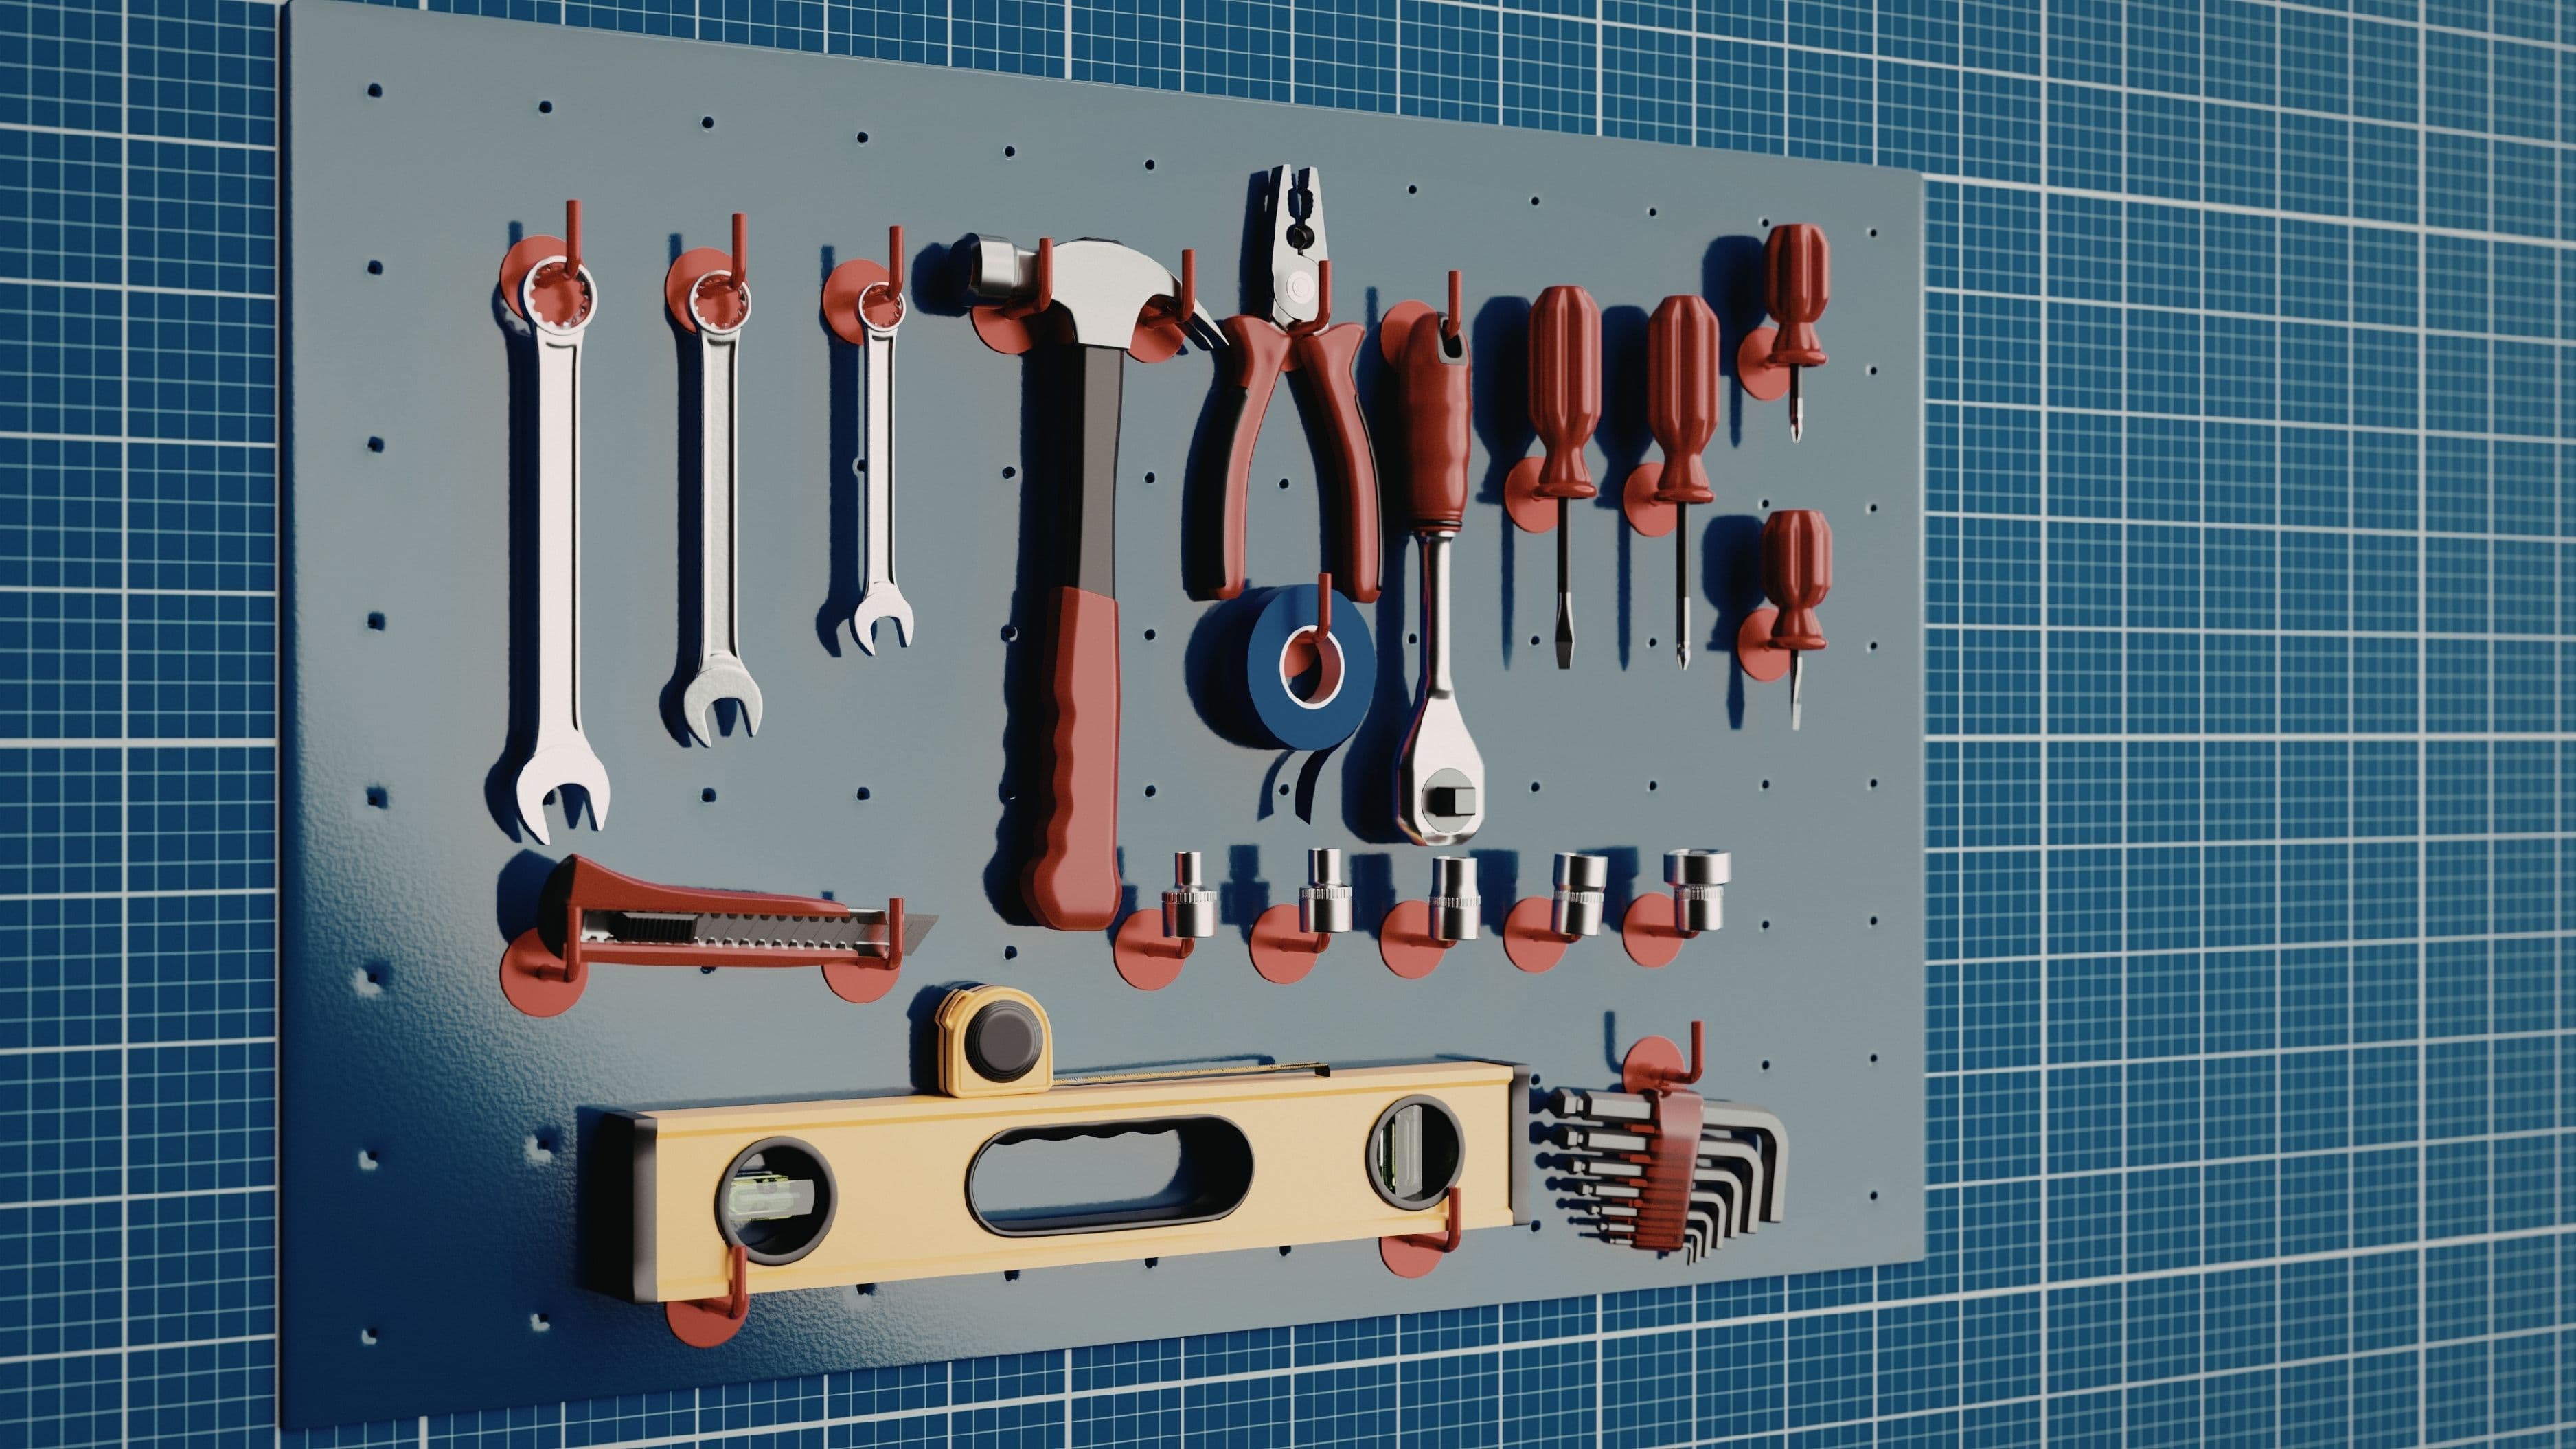
1. Pegboard
Best for: Hand tools, frequently used items, customizable layouts
Pegboard is the most versatile and budget-friendly wall storage system available, and it's been a workshop staple for decades for good reason. A 4x8 sheet of 1/4-inch hardboard pegboard runs $25–$35 at most hardware stores. With a set of assorted hooks ($15–$25 for 50–100 pieces), you get a fully customizable display wall that keeps tools visible and within arm's reach.
The real strength of pegboard is flexibility. Hooks, shelves, bins, and holders are all reconfigurable without any additional work – you pull a hook out and move it. If your tool collection changes or you reorganize your workflow, the pegboard adapts in minutes. For hand tools like hammers, pliers, wrenches, chisels, and screwdrivers, there's no faster or more affordable storage solution.
Installation: Pegboard needs to be mounted 1/2 inch or more off the wall so the hooks have room to engage. Attach horizontal furring strips (1x2 or 1x3 lumber) to wall studs at the top, middle, and bottom of the panel, then screw the pegboard to the furring strips. Use a level to make sure everything is straight before committing to screws. A full 4x8 sheet takes about an hour to install.
What to watch out for: Cheap plastic hooks pull out easily and don't stay in place reliably. Invest in medium-gauge steel hooks – they hold their shape and stay put when you remove a tool. Also, if you mount pegboard in a dusty environment, plan to periodically clean the holes or they'll clog with sawdust and make hook repositioning harder.
Estimated cost: $40–$60 installed (materials only). Difficulty: Easy.
2. French Cleats
Best for: Power tools, jigs, custom holders, heavy items, modular flexibility
French cleats are strips of wood or metal cut at a 45-degree bevel that interlock on the wall. You mount a series of horizontal cleat strips on the wall (typically 3/4-inch plywood ripped at 45 degrees), and then any tool holder, shelf, or bin with a matching 45-degree back edge simply hangs on the wall and can be repositioned horizontally anywhere along the cleat without tools or fasteners. The interlocking angle means the weight of whatever you hang actually tightens the connection rather than pulling it loose.
The French cleat system is beloved by serious woodworkers and workshop builders because it's infinitely customizable, extremely strong, and entirely DIY-able from plywood. You can build exactly the holders you need for your specific tools – a custom holder for your miter saw, a dedicated spot for your router, a cabinet that hangs on the wall and can be moved in seconds. Nothing is permanent, and the wall can be completely reconfigured without removing fasteners.
For a typical home workshop wall, covering the surface with horizontal cleat strips spaced 4–6 inches apart creates a full grid of mounting points. You then build or attach whatever storage you need anywhere on that grid.
Installation: Rip 3/4-inch plywood into 3–4 inch strips at a 45-degree bevel using a table saw or circular saw with a guide. Mount the strips horizontally on studs, bevel pointing up and out, starting from the top of the wall and working down with consistent spacing. Each strip should be screwed into at least two studs. Building tool holders requires basic woodworking – simple dados and cuts with common power tools.
What to watch out for: The DIY approach requires a saw capable of making consistent bevel cuts. If you don't have a table saw, a circular saw with a rip fence and a 45-degree bevel setting will work. Pre-made metal French cleat systems are also available ($50–$150 for wall kits) if you'd rather avoid the cutting.
Estimated cost: $30–$80 for a full wall in plywood (materials); $50–$150 for pre-made metal cleat kits. Difficulty: Intermediate (DIY version); Easy (pre-made kits).
3. Slatwall Panels
Best for: Mixed storage, retail-style organization, renters who want a finished look
Slatwall panels (also called slotwall) are grooved panels that accept a wide range of compatible hooks, shelves, bins, and brackets. They look more finished than pegboard and can carry a variety of accessories without visible hardware. Common in retail displays, they've crossed over into garage and workshop use and are now available at home improvement stores and through workshop supply retailers.
The main appeal of slatwall is the combination of visual cleanliness and versatility. Accessories slide in horizontally and lock in place, and the system handles mixed storage types well – hooks for tools, wire bins for supplies, shelves for cans and bottles, all on the same wall surface. If your garage doubles as a space people see (attached garage with an open door to the house, for example), slatwall looks noticeably cleaner than raw pegboard.
The trade-offs are cost and accessory compatibility. Slatwall panels run $30–$60 per 4x8 section, and quality accessories add up quickly. Also, accessory compatibility varies by panel groove spacing – make sure hooks and bins are spec'd for the panel you buy before purchasing.
Installation: Slatwall panels can be surface-mounted directly to studs or attached to a plywood backing. Panels are heavy (10–15 lbs per sheet), so proper stud anchoring is important. Use screws through the grooves into studs for a clean installation that hides the fasteners.
What to watch out for: Cheaper slatwall materials can crack or flex under heavy loads. Look for MDF-core slatwall panels or aluminum-slot slatwall for higher durability. Plastic slatwall sold for garage use is lighter but not as reliable for heavy tool storage.
Estimated cost: $80–$200 per wall section (panels plus accessories). Difficulty: Easy to intermediate.
4. Wall-Mounted Shelving (Brackets and Rails)
Best for: Bins, cans, bottles, boxed supplies, and items that don't hang well
Not everything belongs on hooks. Paint cans, spray cans, bins of fasteners, adhesives, and project supplies need flat shelf surfaces. Wall-mounted shelving using heavy-duty brackets anchored to studs is the most practical solution for this category.
The standard approach is individual brackets paired with wood or wire shelves. Heavy-duty steel shelf brackets (the L-shaped type rated for 50–100 lbs per pair) are available for $5–$10 each, and a 3/4-inch plywood or solid-wood shelf deck cut to length runs $10–$20. For most workshop supplies, shelves 10–12 inches deep are adequate. Mount the brackets directly into studs with 3-inch screws, ensure they're level across the span, and the shelf will carry significant weight reliably.
Adjustable shelf rail systems (the kind with a vertical rail screwed to the wall and adjustable bracket clips) allow shelf height to be changed without removing everything – useful if your storage needs evolve. These systems run $15–$30 per pair of rails plus the cost of brackets and shelf material.
Installation: Locate studs, mark the bracket positions, pre-drill into studs, and screw brackets in place. Check level at each bracket before final tightening. For long spans (more than 36 inches between brackets), add a third center bracket to prevent sagging under load.
What to watch out for: The most common mistake is mounting brackets into drywall anchors rather than studs for heavy-load shelves. Hollow-wall anchors are appropriate for light decorative shelves, not workshop storage carrying tools, cans, and equipment. Know where your studs are and anchor into them.
Estimated cost: $20–$60 per shelf depending on length and bracket type. Difficulty: Easy.
5. Tool-Specific Wall Mounts
Best for: Clamps, lumber, long-handled tools, extension cords, safety gear
Some tools and materials don't fit neatly into pegboard hooks or general shelving and need dedicated wall mounting solutions. A few specific ones worth having in most home workshops:
Clamp racks can be built from simple horizontal wooden dowels or lengths of 1-inch conduit mounted between blocks on the wall. Clamps hang by their screw mechanism, keeping them accessible and off the floor. A basic clamp rack handles 10–20 clamps in 2 feet of wall space and costs under $20 in materials to build.
Lumber storage on the wall is handled by horizontal arms – steel pipe or wood dowels projecting 16–24 inches from a wall-mounted rail or set of vertical supports. Dimensional lumber and sheet goods can be stored vertically or horizontally depending on the setup. A basic horizontal lumber rack built from 2x4s and threaded rod costs $30–$50 in materials.
Long-handled tools (rakes, shovels, brooms, levels, pipe) hang efficiently on simple horizontal rails with clip-style holders or J-hooks. These are available pre-made for under $20 for a set of 5–6 holders, or easily improvised from PVC pipe sections or wooden blocks with holes drilled through them.
Extension cords and hoses stay organized on wall-mounted cord reels or simple wooden spindles. A mounted cord reel ($20–$40) keeps a 50-foot extension cord from becoming a tangled mess on the floor and reduces tripping hazard significantly.
Estimated cost: $15–$60 per specific storage solution. Difficulty: Easy to intermediate depending on the build.
Putting It Together: Which Systems to Combine
For most home workshops, the most effective wall storage setup combines three elements. Pegboard or French cleats handle hand tools and custom-built holders for power tools. Wall-mounted shelving handles bins, cans, and boxed supplies. Tool-specific mounts address the items that don't fit neatly into either category. Slatwall is a solid alternative to pegboard and French cleats for those who want a cleaner visual finish and don't mind the higher cost.
If you're starting from scratch with a limited budget, begin with pegboard for the workbench wall (the wall you face most often while working), add two or three shelves above and to the side for supplies, and address specific storage problems as they come up with targeted mounts. That core setup handles the majority of workshop storage at the lowest cost.
If you're building out a more serious shop and have a budget of $200–$400 for wall storage, a combination of French cleats covering one or two walls with custom-built holders, plus solid wall-mounted shelving for supplies, gives you the most flexible and durable system available.
What to Avoid
Don't anchor heavy storage into drywall without hitting studs. Drywall alone cannot hold the combined weight of tools and supplies once a shelf or pegboard section is fully loaded. A stud finder is a $15–$20 investment that prevents a shelf failure from sending everything crashing to the floor.
Avoid buying pre-made garage cabinet systems from big-box stores as your primary wall storage solution. They're expensive for what you get, are often made of thin material that doesn't hold up to workshop conditions, and lock you into a fixed layout. DIY or semi-DIY systems give you more storage per dollar and more flexibility long-term.
Don't put everything on one system. A wall covered entirely in pegboard runs out of hook configurations for larger items, and a wall covered entirely in shelves doesn't work for tools that need to hang. The most functional shops combine systems matched to what they're storing.
FAQ
How much weight can pegboard actually hold? Standard 1/4-inch hardboard pegboard mounted on furring strips can hold 25–50 lbs per square foot when properly installed into studs. Individual hooks are rated for 5–10 lbs each depending on gauge. For heavier items (larger power tools, cast iron), use French cleats or dedicated wall-mount solutions instead.
Can I install wall storage on a concrete garage wall? Yes, but it requires masonry anchors and a hammer drill. For concrete walls, use sleeve anchors or concrete screws (Tapcon is a reliable brand) rather than standard wood screws. Drill into the concrete with a masonry bit, then drive the anchor or screw into the hole. The process is straightforward once you have the right tools.
What's the best way to mount pegboard to a concrete wall? Use furring strips attached to the concrete wall with masonry screws, then mount the pegboard to the furring strips as you would on a wood-framed wall. This keeps the pegboard off the concrete surface (which is important for hook clearance) and creates a mounting surface you can drill standard screws into.
How deep should workshop shelves be? For most workshop supplies, 10–12 inches of depth is adequate for paint cans, spray cans, and boxed supplies. For larger items or bins, 16 inches gives you more flexibility. Avoid going deeper than 20–24 inches unless you have a specific need – deep shelves tend to accumulate hidden clutter in the back and make it harder to see what you have.
Is French cleat worth it if I don't have a table saw? Yes – you can rip plywood strips at a bevel using a circular saw with a bevel adjustment and a rip fence guide, or purchase pre-cut metal French cleat strips online or from woodworking supply retailers. It takes more setup time without a table saw, but the system is still very achievable for an intermediate DIYer with basic power tools.
Wrapping Up
The best wall storage system for your home workshop isn't one thing – it's a combination of systems matched to what you're actually storing. Pegboard for hand tools, French cleats or slatwall for power tools and custom holders, wall-mounted shelves for supplies, and specific mounts for the items that don't fit neatly into categories. Start with the wall you face most often, cover the highest-priority storage needs first, and build out from there. A well-planned workshop wall pays for itself quickly in time saved looking for tools and frustration avoided every time you sit down to work.
📚 Sources
How to install pegboard in a garage workshop – This Old House: https://www.thisoldhouse.com/garages/21017148/how-to-install-pegboard
French cleat wall storage systems explained – The Family Handyman: https://www.familyhandyman.com/project/how-to-build-a-french-cleat-tool-storage-wall/
Wall-mounted shelving installation guide – Family Handyman: https://www.familyhandyman.com/project/how-to-install-wall-shelves/
Garage storage planning and organization – The Spruce: https://www.thespruce.com/garage-storage-ideas-5076186
How to use masonry anchors and concrete screws – Bob Vila: https://www.bobvila.com/articles/how-to-use-wall-anchors/
Workshop storage and tool organization tips – Fine Homebuilding: https://www.finehomebuilding.com/project-guides/tools-workshop
🔍 Explore Related Topics